Containers & Agents with Docker
Series: Foundations of Digital Agency — Part 9 ← Part 8: All About AI & Using LLM Tools → Part 10: Becoming Agentic & Sovereign with Obsidian
You have a fundamental problem in software: your code works on your machine, but breaks on someone else's. Different operating systems. Different versions of dependencies. Different configurations. "It works on my machine" is the oldest excuse in development.
There's another problem too: packages. You install npm packages to build things faster. But what if a package has malicious code? What if it goes rogue and tries to access your system files? Without isolation, one bad package can compromise everything.
**Containers solve both problems.** A container packages your application *plus everything it needs to run*—the exact runtime, the exact dependencies, the exact configuration—into a single, portable unit. It also isolates your application in a sandbox: if a package misbehaves, it's confined to that container. It can't touch your other projects or your system files. The same container runs on your laptop, a colleague's Mac, and a production server. No surprises. No risk spillover.
Docker is the standard tool for building and running containers. This guide teaches you what Docker does, how it works, and why it matters.
Once you understand Docker, we can apply it as a solution for a specific problem: **containing an agent** so it can run without accessing your entire system. We'll set that up, connect it to Discord or Telegram, and you'll have deployed your first production system.
---
## The Problems Containers Solve
Imagine you're running an application on your laptop. It works fine. But then:
- Your application depends on Python 3.11, but you upgrade to Python 3.12 for another project. Now the first application breaks.
- You want to deploy the application to a server. You install dependencies, but the server has a different OS version or different package versions. Things behave differently.
- Your application crashes. It stays down until you manually restart it.
- You install a sketchy npm package for one project. It misbehaves and starts corrupting files. It affects your entire system.
- You want to run the same application on Windows and macOS. You need different installation instructions for each platform. Developers always forget a step.
These are the problems containers solve:
**Reproducibility** — The same container runs identically on your laptop, a colleague's Mac, a staging server, and production. No "works on my machine" surprises. No platform-specific configuration nightmares.
**Isolation** — Each container is sandboxed. One application's dependencies don't conflict with another's. A misbehaving package or crashed application or AI agent is confined to its container—it can't damage your system or other projects.
**Reliability** — If an application crashes, the container can automatically restart it. Long-running services stay alive without manual intervention.
**Deployment simplicity** — You don't install your application on a server. You just run the container. Same image, same behavior, everywhere.
---
## What is Docker?
**Docker** is a containerization platform. It packages your application—plus everything it needs to run—into a single, portable unit. Think of it this way:
- **Without Docker** — You ship code to someone and say, "Install Node.js 24, npm 11, these 50 packages, and run this." Hope their setup matches yours.
- **With Docker** — You ship a container. It includes Node.js 24, npm 11, all 50 packages, and your code. It runs identically everywhere.
### The Mental Model: Images and Containers
**A Docker image** is a blueprint—a template that describes how to build an environment. It's like a recipe.
**A Docker container** is a running instance of that image. It's like baking a cookie from the recipe.
You create one image. You can run multiple containers from it. Each container is isolated and independent.
---
## The Dockerfile: Your Recipe
To build a Docker image, you write a `Dockerfile`—a set of instructions. Here's an example:
```dockerfile
FROM node:24-slim
WORKDIR /app
RUN npm install -g some-app
ENV PORT=3000
VOLUME ["/data"]
CMD ["some-app", "start"]
```
Each instruction does something:
| Instruction | Meaning |
|-------------|---------|
| `FROM node:24-slim` | Start with Node.js 24 (base OS + runtime) |
| `WORKDIR /app` | Create `/app` directory (where your app lives) |
| `RUN npm install -g some-app` | Install the application globally |
| `ENV PORT=3000` | Set an environment variable |
| `VOLUME ["/data"]` | Mark a directory for persistent storage |
| `CMD ["some-app", "start"]` | Default command to run |
When Docker builds this, it creates layers. Layer 1 is Node.js. Layer 2 is the app. If you rebuild and only change the app, Docker reuses layer 1 from cache. It's fast.
---
## Docker Compose: Orchestrating Containers
Real applications need more than just a Dockerfile. You need to:
- Set environment variables
- Mount persistent storage
- Handle restarts
- Configure networking
**Docker Compose** is a tool that manages all this. You write a `compose.yaml` file:
```yaml
services:
myapp:
build: .
restart: unless-stopped
volumes:
- app-data:/data
environment:
- PORT=3000
volumes:
app-data:
```
This tells Docker:
- Build the image from the Dockerfile in this directory
- If the container crashes, restart it automatically
- Mount persistent storage at `/data` (survives restarts)
- Pass environment variables into the container
Compose is the orchestrator—it keeps your container running, manages storage, handles restarts.
---
## Persistent State: Volumes and Data
Here's an important concept: **containers are ephemeral by default.** When you stop a container, any data stored inside it is lost.
This is actually a feature—it means containers are isolated and clean. But for applications that need to remember things (databases, agent configurations, user data), you need persistence.
**Volumes** are Docker's solution. A volume is a storage location outside the container that survives restarts. When you mount a volume in a container, it can read and write data that persists even after the container stops.
In your `compose.yaml`, you define volumes:
```yaml
volumes:
agent-workspace:
```
And then mount them in your container:
```yaml
volumes:
- agent-workspace:/workspace
```
This tells Docker: "Create a persistent storage called `agent-workspace`, and mount it at `/workspace` inside the container." When the container stops, the data stays. When you restart the container, it reconnects to the same volume and picks up where it left off.
This is how your agent remembers things between restarts.
---
## Container Registries: The Registry Pattern (Again)
Remember NPM Registry? Container registries follow the same pattern — a central place to publish and pull pre-built images.
**Docker Hub** is the default registry. When you write `FROM node:24-slim`, Docker automatically downloads that image from Hub. You can push your own images there too:
```bash
docker build -t yourname/myapp:1.0 .
docker push yourname/myapp:1.0
```
**GitHub Container Registry (ghcr.io)** is GitHub's equivalent — many open-source projects publish their official images here instead of Docker Hub, since their code already lives on GitHub. When you pull `ghcr.io/someproject/someapp:latest`, it works exactly the same way, just from a different registry.
Both OpenClaw and Hermes publish official pre-built images — you don't need to write a Dockerfile or install anything. You just reference the image and Docker pulls it.
This is how applications are distributed in the modern world — not as source code, but as ready-to-run containers.
---
## Install Docker
You need Docker Desktop running on your machine.
:::tabs
::tab[macOS]
1. Download: https://docs.docker.com/desktop/setup/install/mac-install/ (choose your chip: Apple Silicon or Intel)
2. Open the `.dmg` and drag Docker to Applications.
3. Launch Docker from Applications.
::tab[Windows]
1. Download: https://docs.docker.com/desktop/setup/install/windows-install/
2. Run the installer. Keep **Use WSL 2 instead of Hyper-V** checked.
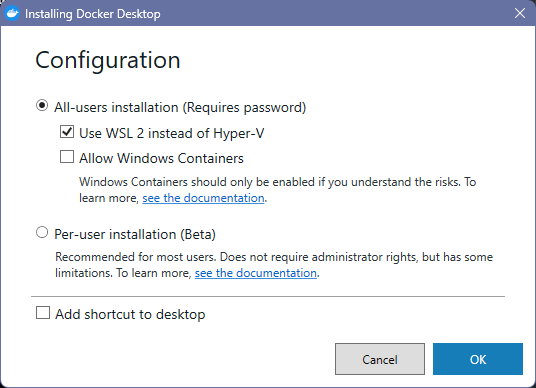
3. Reboot if prompted.
4. Launch Docker Desktop from the Start Menu.
5. In Docker Desktop: **Settings → Resources → WSL Integration** → enable it with Ubuntu.
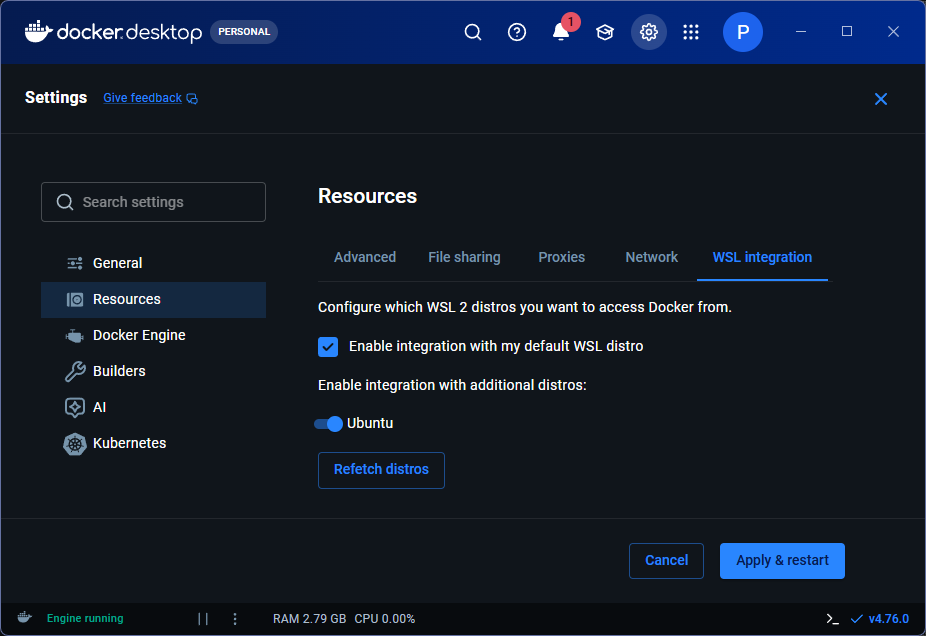
6. In a PowerShell terminal, restart WSL:
```pwsh
wsl --shutdown
```
> All further terminal commands in this guide run in your **WSL terminal** (Ubuntu), not PowerShell. Open it from the Start Menu or Windows Terminal.
::tab[Linux]
Follow your distribution's guide: https://docs.docker.com/engine/install/
After installing, add your user to the docker group so you can run commands without `sudo`:
```bash
sudo usermod -aG docker $USER
```
Log out and back in for it to take effect.
:::
**Verify it's working:**
```bash
docker run hello-world
```
You should see "Hello from Docker!" — you're good.
## Why Run an Agent in a Container?
An AI agent is autonomous. It thinks, decides, and takes actions without you telling it each step. You could run it directly on your machine, but here's the problem: **an autonomous agent with full access to your system is dangerous.**
If it has permission to access your file system, it could read, modify, or delete files. If it has access to your email or social media, it could send messages on your behalf. If it misbehaves, or if there's a bug in its reasoning, it could compromise your data or damage your system.
You don't want an autonomous agent running freely with full system access. You want it **contained**.
**A container provides a sandbox:**
- The agent runs in an isolated environment. It can't access your file system, your other projects, or your personal data unless you explicitly give it permission.
- If the agent misbehaves or causes damage, it's confined to the container. Your system stays safe.
- You control exactly what it has access to (a specific folder, a specific API key, your chat platform) through configuration.
- If something goes wrong, you destroy the container and start fresh. Your system is unaffected.
This is why containers are essential for running autonomous agents safely.
---
## Choose Your Agent
This guide covers two operator agents. Pick one — the Docker concepts are identical, the commands differ.
:::tabs
::tab[OpenClaw]
**OpenClaw** is a polished, full-featured operator agent with a web UI, 50+ model providers, and device pairing out of the box. It's built around a single unified onboarding wizard.
- Image: `ghcr.io/openclaw/openclaw:latest` (GitHub Container Registry)
- Dashboard port: **18789**
- Workspace: `/workspace` inside the container
- Onboarding: one interactive wizard
::tab[Hermes]
**Hermes** (Nous Research) is an open-source, extensibility-focused agent with 300+ model integrations and a self-improvement loop. Setup uses two separate commands — one for the model, one for the channel.
- Image: `nousresearch/hermes-agent:latest` (Docker Hub)
- Dashboard port: **9119**
- Workspace: `/opt/data` inside the container
- Onboarding: two steps (`hermes setup` + `hermes gateway setup`)
:::
---
## Prepare Your AI Model Credentials
Your agent needs an AI model to think. Before you run setup, get your credentials ready — the wizard will ask for them. Nothing goes into your agent yet; you're just making sure you have what you need when the time comes.
:::tabs
::tab[Claude]
> Starting June 15, 2026 Claude subscribers will get a separate monthly "Agent SDK credit" for third-party tools like OpenClaw and Hermes. The official page is here: https://support.claude.com/en/articles/15036540-use-the-claude-agent-sdk-with-your-claude-plan
>
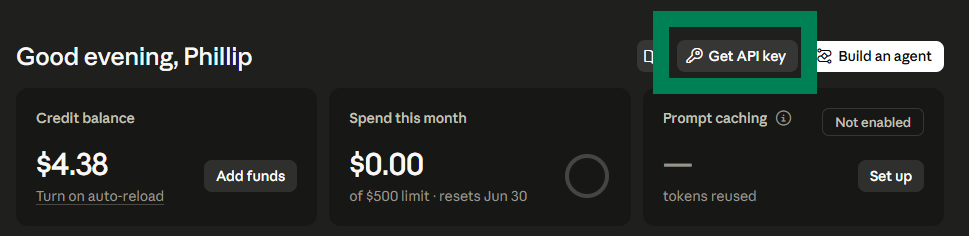
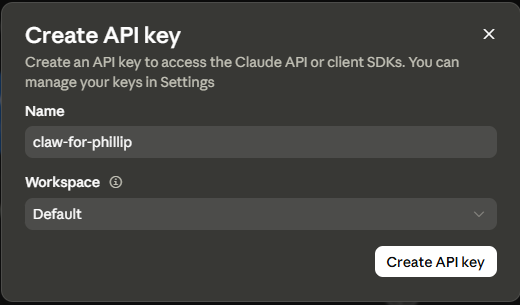
> **If you're before June 15, 2026** — the Agent SDK credit hasn't kicked in yet. Set up a pay-as-you-go API key at [console.anthropic.com](https://console.anthropic.com). Load a small amount of credit (even $5 is enough to experiment), generate an API key, and have it ready for onboarding. You only pay for what you use — no commitment, no second subscription.
> 
> 
>
> **Once June 15 hits** — opt in to the $20/month Agent SDK credit from your Claude account, and your agent authenticates through your subscription. That $20 covers light use. If you burn through it mid-month, the agent stops until your next billing cycle (unless you enable overage billing, which charges API rates).
::tab[ChatGPT]
If you have a **ChatGPT Plus or Pro subscription**, you can authenticate via OAuth — no separate API key needed. Your agent will prompt you to connect through your ChatGPT account during setup.
If you'd rather use a pay-as-you-go API key (or don't have a subscription):
1. Go to https://platform.openai.com and create an account
2. **API keys** → **Create new secret key** → copy it
3. **Billing** → add $5+
> The API is pay-per-use. $5 lasts a while for personal use with GPT-4o mini.
::tab[Gemini]
Get a free API key from Google AI Studio — no billing required for the free tier.
1. Go to https://aistudio.google.com and sign in with your Google account
2. **Get API key** → **Create API key** → copy it and keep it handy for onboarding
> Gemini Flash is the cost-effective always-on choice (~$0.15/$0.60 per 1M tokens). The free tier (60 req/min) is enough to get started without adding billing at all.
::tab[Open]
Get a free API key from OpenRouter — one key, access to 300+ models from every major lab.
1. Go to https://openrouter.ai and create an account
2. **Keys** → **Create key** → copy it and keep it handy for onboarding
> DeepSeek-V4-Pro is a strong starting point (~$1.74/$3.48 per 1M tokens). Llama 4 and Qwen3 are solid free-tier options. No lock-in — switch models with a config change.
::tab[Local]
Run models entirely on your machine — no API key, no per-token cost, fully private.
1. Install Ollama: https://ollama.com/download
2. Pull a model: `ollama pull qwen3:14b` (or `ollama pull deepseek-coder:33b` with 24GB+ RAM)
3. Make sure Ollama is running: `ollama serve`
During setup, you'll select Ollama as the provider and enter `http://host.docker.internal:11434` as the endpoint — no API key needed. (On Linux, this requires the `extra_hosts` line in your compose.yaml — covered in the setup steps below.)
> **Hardware requirement:** 16GB RAM for lighter models, 24GB+ for models that perform well on complex tasks. If your machine doesn't have that, the Open (OpenRouter) path is the better choice.
:::
## Set Up a Chat Channel
Your agent needs somewhere to listen and respond. Pick whichever platform you already use.
::::tabs
::tab[OpenClaw]
OpenClaw supports Discord, Telegram, Slack, WhatsApp, and more — all configured through the onboarding wizard. The steps here cover Discord and Telegram; other platforms follow the same pattern in the wizard.
:::tabs
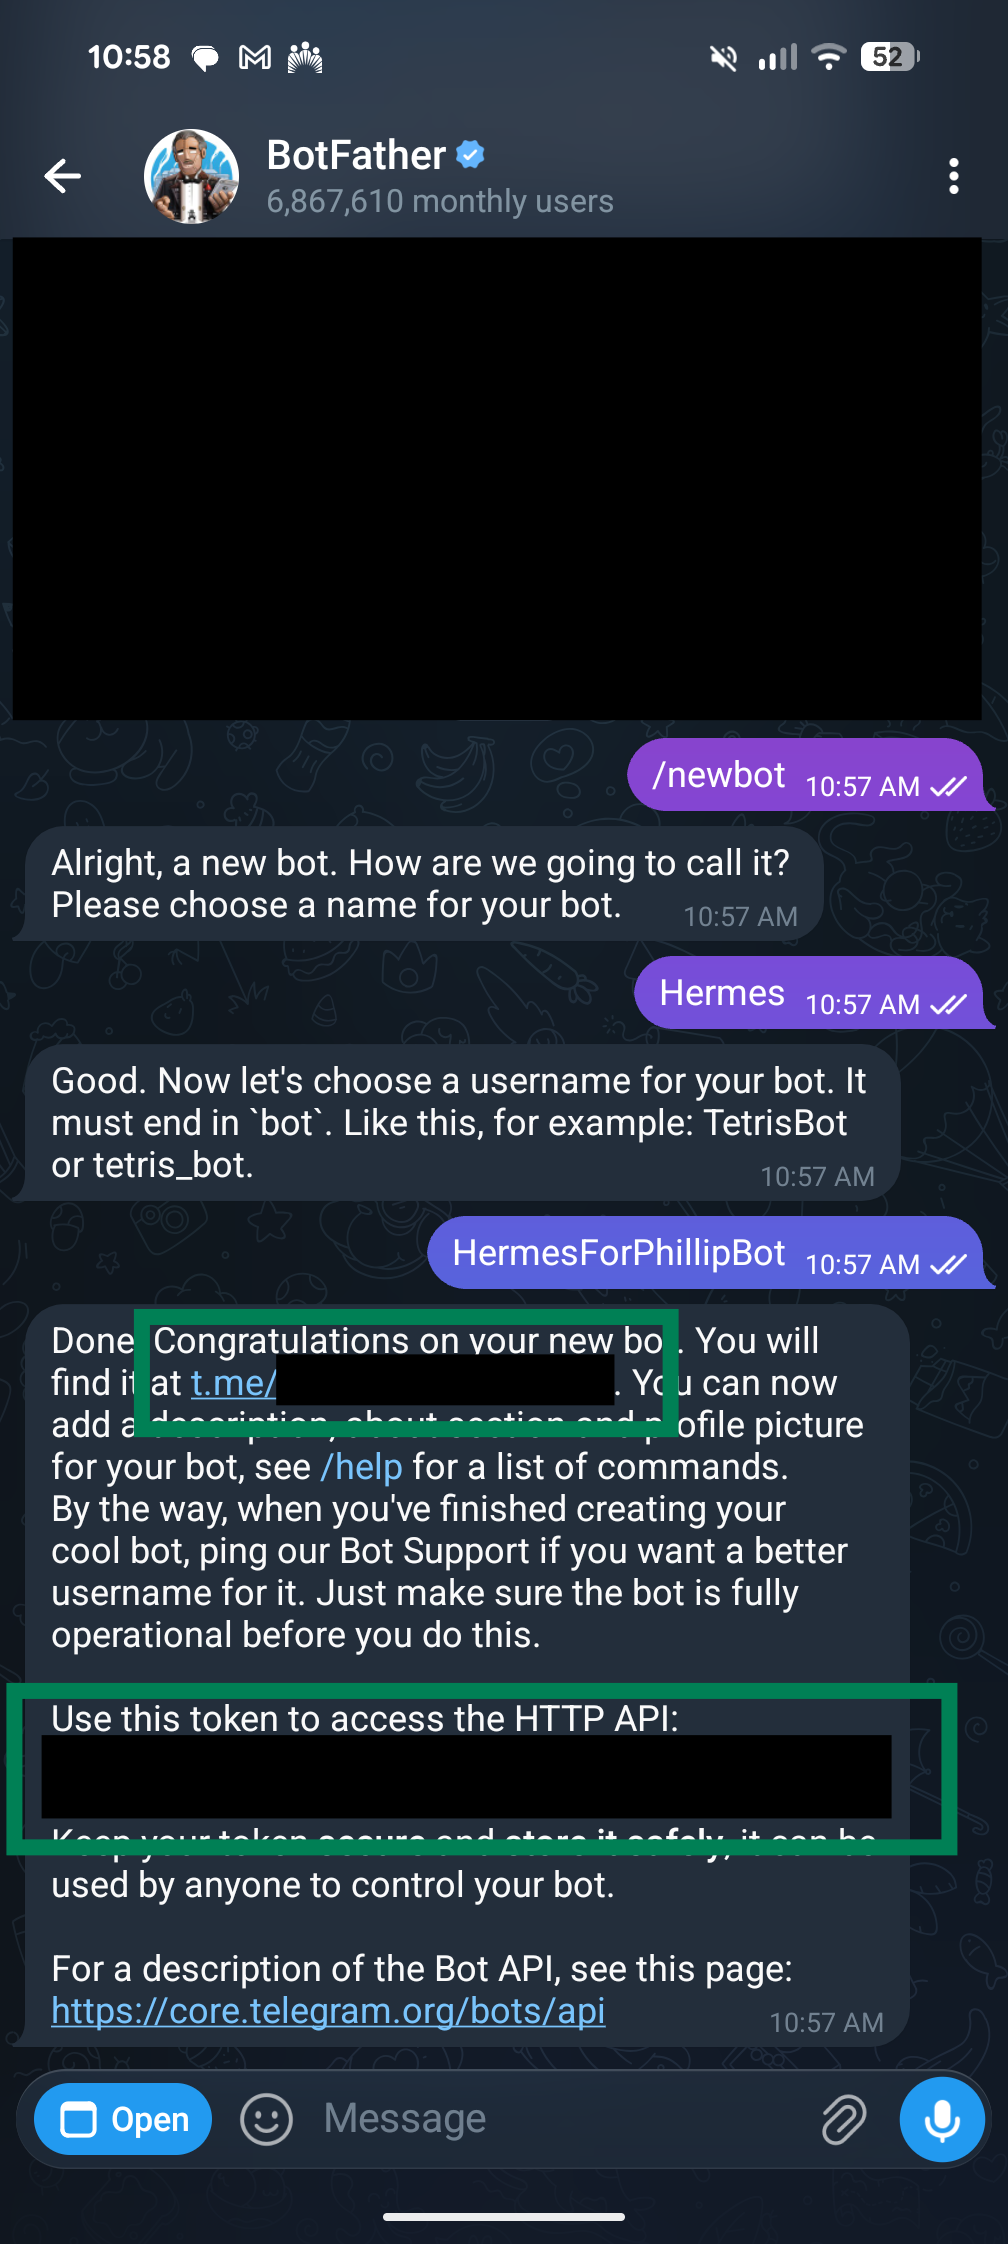
::tab[Telegram]
Telegram's bot setup is the simplest of any platform — one conversation with a bot that makes bots.
1. Open Telegram: https://telegram.org
2. Search for **@BotFather** and start a chat.
Direct link: https://t.me/BotFather

3. Send `/newbot`
4. Give it a display name (e.g., "My Agent")
5. Give it a username ending in `bot` (e.g., `myagent_bot`)
> It can be tricky to give it a unique name. Try something like `ClawForPhillipBot`!
6. BotFather replies with your **bot token** — copy it
That's it. No developer portal, no OAuth app, no server to manage. You'll chat with your agent by messaging the bot directly.
::tab[Discord]
Create a bot for your agent to control.
**First, create a Discord server** (if you don't have one already):
1. Open Discord: https://discord.com
2. Click the **+** icon on the left sidebar
3. **Create My Own** → give it a name (e.g., "My Agent") → Create
4. You now have a private server where your agent will live
**Create the bot:**
1. Go to: https://discord.com/developers/applications
2. **New Application** → name it (e.g., "My Agent") → Create
3. Left sidebar: **Bot**
4. **Reset Token** → **copy the token** (you won't see it again)
5. **Privileged Gateway Intents** → enable **Message Content Intent** → Save
**Invite the bot to a server:**
1. **OAuth2 → URL Generator**
2. Scopes: check **bot**
3. Permissions: check **Send Messages**, **Read Message History**, **View Channels**
4. Copy the URL → paste in browser → select your server → Authorize
Once the bot is in a server, you can DM it or tag it in any channel.
:::
::tab[Hermes]
Hermes supports 20+ platforms — Discord, Telegram, Slack, WhatsApp, Signal, Email, Matrix, Microsoft Teams, and more — all from a single `hermes gateway setup` wizard. The steps here cover Discord and Telegram; other platforms follow the same pattern.
:::tabs
::tab[Telegram]
Telegram's bot setup is the simplest of any platform — one conversation with a bot that makes bots.
1. Open Telegram: https://telegram.org
2. Search for **@BotFather** and start a chat
Direct link: https://t.me/BotFather

3. Send `/newbot`
4. Give it a display name (e.g., "My Agent")
5. Give it a username ending in `bot` (e.g., `myagent_bot`)
> It can be tricky to give it a unique name. Try something like `ClawForPhillipBot`!
6. BotFather replies with your **bot token** — copy it
7. Click the link to open a chat with your bot (it's not running yet).
That's it. No developer portal, no OAuth app, no server to manage. You'll chat with your agent by messaging the bot directly.
::tab[Discord]
Create a bot for your agent to control.
**First, create a Discord server** (if you don't have one already):
1. Open Discord: https://discord.com
2. Click the **+** icon on the left sidebar
3. **Create My Own** → give it a name (e.g., "My Agent") → Create
4. You now have a private server where your agent will live
**Create the bot:**
1. Go to: https://discord.com/developers/applications
2. **New Application** → name it (e.g., "My Agent") → Create
3. Left sidebar: **Bot**
4. **Reset Token** → **copy the token** (you won't see it again)
5. **Privileged Gateway Intents** → enable **Message Content Intent** → Save
**Invite the bot to a server:**
1. **OAuth2 → URL Generator**
2. Scopes: check **bot**
3. Permissions: check **Send Messages**, **Read Message History**, **View Channels**
4. Copy the URL → paste in browser → select your server → Authorize
Once the bot is in a server, you can DM it or tag it in any channel.
:::
::::
---
## Quick Setup: Have Your Coding Agent Do It
If you have Claude Code, Cursor, Windsurf, or a similar coding agent, select your combination below and paste the matching prompt. Your agent will ask for your credentials in the chat, write all the project files, and run all commands itself — you just answer two questions.
:::::tabs
::tab[Claude]
Have your **Anthropic API key** ready — get one at [console.anthropic.com](https://console.anthropic.com).
::::tabs
::tab[OpenClaw]
:::tabs
::tab[Telegram]
```wrap
Set up OpenClaw in Docker connected to Telegram, using Claude (Anthropic) as the AI model.
For an AI agent doing this setup: run every command yourself — never tell the user to open a terminal. Ask the user only for the §0 inputs, the §4 pairing code, and in-app actions (messaging the bot, opening the dashboard). Hold secrets in memory only. WAIT = hard gate.
§0. Ask the user (WAIT for all four before continuing):
1. Anthropic API key — sk-ant-... from console.anthropic.com → API Keys.
2. Telegram bot token — @BotFather → /newbot → name + ...bot username.
3. Agent name — something short (e.g. "Scout").
4. Agent description — a complete sentence: who the user is + how to behave.
§1. Write ~/projects/openclaw/compose.yaml:
services:
openclaw:
image: ghcr.io/openclaw/openclaw:latest
container_name: openclaw
volumes:
- openclaw-workspace:/workspace
environment:
- OPENCLAW_WORKSPACE=/workspace
- OPENCLAW_STATE_DIR=/workspace/.openclaw
stdin_open: true
tty: true
openclaw-gateway:
image: ghcr.io/openclaw/openclaw:latest
container_name: openclaw-gateway
restart: unless-stopped
volumes:
- openclaw-workspace:/workspace
environment:
- OPENCLAW_WORKSPACE=/workspace
- OPENCLAW_STATE_DIR=/workspace/.openclaw
ports:
- "127.0.0.1:18789:18789"
command: openclaw gateway run --bind lan
volumes:
openclaw-workspace:
name: openclaw-workspace
Validate: cd ~/projects/openclaw && docker compose config --quiet
§2. Run setup (from ~/projects/openclaw; substitute real values for <...>):
# Fix volume ownership first — a fresh named volume is root-owned but the container runs as uid 1000; skip this and onboarding fails with EACCES.
docker run --rm --user root -v openclaw-workspace:/workspace ghcr.io/openclaw/openclaw:latest chown -R 1000:1000 /workspace
# Auth + workspace (apiKey, NOT "anthropic" which wants claude auth login)
docker compose run --rm openclaw openclaw onboard --non-interactive --accept-risk --flow quickstart --auth-choice apiKey --anthropic-api-key '<ANTHROPIC_API_KEY>' --workspace /workspace --skip-channels --skip-search --skip-skills --skip-hooks --no-install-daemon --skip-health
# Telegram channel
docker compose run --rm openclaw openclaw channels add --channel telegram --token '<TELEGRAM_BOT_TOKEN>' --name '<AGENT_NAME>'
# Model — must be in this build's catalog; an off-catalog id sets silently but fails at runtime with "Unknown model". Check options: docker compose run --rm openclaw openclaw models list
docker compose run --rm openclaw openclaw models set anthropic/claude-sonnet-4-6
# Web search + session-memory
docker compose run --rm openclaw openclaw plugins enable duckduckgo
docker compose run --rm openclaw openclaw hooks enable session-memory
§3. Start + verify:
docker compose up -d openclaw-gateway && sleep 6
docker exec openclaw-gateway openclaw models status
docker logs openclaw-gateway 2>&1 | grep -i "unknown model" && echo "BAD: model not in catalog"
curl -s -o /dev/null -w "dashboard HTTP %{http_code}\n" http://127.0.0.1:18789/
Telegram shows running, disconnected until pairing — that's normal.
§4. Pair the user (WAIT):
Ask the user: Message your bot /start in Telegram. It replies with a pairing code — paste it here.
Once you have the code: docker exec openclaw-gateway openclaw pairing approve telegram <PAIRING_CODE>
§5. Write the persona (<DESCRIPTION> is inserted verbatim — make it a complete, capitalized sentence):
docker exec openclaw-gateway sh -c 'printf "# <AGENT_NAME>\n\nYou are <AGENT_NAME>, my personal AI assistant. <DESCRIPTION>\n" > /workspace/SOUL.md'
docker compose restart openclaw-gateway
§6. Give the user the dashboard URL — the UI is token-gated. Read the token:
docker exec openclaw-gateway sh -c 'node -e "console.log(require(process.env.OPENCLAW_STATE_DIR+\"/openclaw.json\").gateway.auth.token)"'
Tell the user: Your agent is live. Open this (logs you in automatically; keep it private): http://127.0.0.1:18789/#token=<GATEWAY_TOKEN>
```
::tab[Discord]
```wrap
Set up OpenClaw in Docker connected to Discord, using Claude (Anthropic) as the AI model.
For an AI agent doing this setup: run every command yourself — never tell the user to open a terminal. Ask the user only for the §0 inputs and in-app actions (adding the bot to the server, opening the dashboard). Credentials go into compose.yaml — don't write them anywhere else. WAIT = hard gate.
§0. Ask the user (WAIT for all four before continuing):
1. Anthropic API key — sk-ant-... from console.anthropic.com → API Keys.
2. Discord bot token — discord.com/developers/applications → New Application → Bot → Reset Token (copy it). Enable Message Content Intent. OAuth2 URL Generator: scope bot, permissions Send Messages / Read Message History / View Channels → paste the URL in browser → authorize for their server. Then paste the bot token here.
3. Agent name — something short (e.g. "Scout").
4. Agent description — a complete sentence: who the user is + how to behave.
§1. Write ~/projects/openclaw/compose.yaml:
services:
openclaw:
image: ghcr.io/openclaw/openclaw:latest
container_name: openclaw
volumes:
- openclaw-workspace:/workspace
environment:
- OPENCLAW_WORKSPACE=/workspace
- OPENCLAW_STATE_DIR=/workspace/.openclaw
stdin_open: true
tty: true
openclaw-gateway:
image: ghcr.io/openclaw/openclaw:latest
container_name: openclaw-gateway
restart: unless-stopped
volumes:
- openclaw-workspace:/workspace
environment:
- OPENCLAW_WORKSPACE=/workspace
- OPENCLAW_STATE_DIR=/workspace/.openclaw
ports:
- "127.0.0.1:18789:18789"
command: openclaw gateway run --bind lan
volumes:
openclaw-workspace:
name: openclaw-workspace
Validate: cd ~/projects/openclaw && docker compose config --quiet
§2. Run setup (from ~/projects/openclaw; substitute real values for <...>):
# Fix volume ownership first — a fresh named volume is root-owned but the container runs as uid 1000; skip this and onboarding fails with EACCES.
docker run --rm --user root -v openclaw-workspace:/workspace ghcr.io/openclaw/openclaw:latest chown -R 1000:1000 /workspace
# Auth + workspace (apiKey, NOT "anthropic" which wants claude auth login)
docker compose run --rm openclaw openclaw onboard --non-interactive --accept-risk --flow quickstart --auth-choice apiKey --anthropic-api-key '<ANTHROPIC_API_KEY>' --workspace /workspace --skip-channels --skip-search --skip-skills --skip-hooks --no-install-daemon --skip-health
# Discord channel
docker compose run --rm openclaw openclaw channels add --channel discord --token '<DISCORD_BOT_TOKEN>' --name '<AGENT_NAME>'
# Model — must be in this build's catalog; an off-catalog id sets silently but fails at runtime with "Unknown model". Check options: docker compose run --rm openclaw openclaw models list
docker compose run --rm openclaw openclaw models set anthropic/claude-sonnet-4-6
# Web search + session-memory
docker compose run --rm openclaw openclaw plugins enable duckduckgo
docker compose run --rm openclaw openclaw hooks enable session-memory
§3. Start + verify:
docker compose up -d openclaw-gateway && sleep 6
docker exec openclaw-gateway openclaw models status
docker logs openclaw-gateway 2>&1 | grep -i "unknown model" && echo "BAD: model not in catalog"
curl -s -o /dev/null -w "dashboard HTTP %{http_code}\n" http://127.0.0.1:18789/
§4. Write the persona (<DESCRIPTION> is inserted verbatim — make it a complete, capitalized sentence):
docker exec openclaw-gateway sh -c 'printf "# <AGENT_NAME>\n\nYou are <AGENT_NAME>, my personal AI assistant. <DESCRIPTION>\n" > /workspace/SOUL.md'
docker compose restart openclaw-gateway
§5. Give the user the dashboard URL — the UI is token-gated. Read the token:
docker exec openclaw-gateway sh -c 'node -e "console.log(require(process.env.OPENCLAW_STATE_DIR+\"/openclaw.json\").gateway.auth.token)"'
Tell the user: Your agent is live. Open this (logs you in automatically; keep it private): http://127.0.0.1:18789/#token=<GATEWAY_TOKEN>
```
:::
::tab[Hermes]
:::tabs
::tab[Telegram]
```wrap
Set up Hermes in Docker connected to Telegram, using Claude (Anthropic) as the AI model.
For an AI agent doing this setup: run every command yourself — never tell the user to open a terminal. Ask the user only for the §0 inputs and in-app actions (messaging the bot, opening the dashboard). Credentials go into compose.yaml — don't write them anywhere else. WAIT = hard gate.
§0. Ask the user (WAIT for all four before continuing):
1. Anthropic API key — sk-ant-... from console.anthropic.com → API Keys.
2. Telegram bot token — @BotFather → /newbot → name + ...bot username.
3. Agent name — something short (e.g. "Scout").
4. Agent description — a complete sentence: who the user is + how to behave.
§1. Write ~/projects/hermes/compose.yaml (substitute real values for <...>):
services:
hermes:
image: nousresearch/hermes-agent:latest
container_name: hermes
restart: unless-stopped
volumes:
- hermes-workspace:/opt/data
ports:
- "127.0.0.1:9119:9119"
environment:
- ANTHROPIC_API_KEY=<ANTHROPIC_API_KEY>
- TELEGRAM_BOT_TOKEN=<TELEGRAM_BOT_TOKEN>
- HERMES_DASHBOARD=true
- HERMES_DASHBOARD_HOST=0.0.0.0
- HERMES_DASHBOARD_PORT=9119
- HERMES_DASHBOARD_INSECURE=true
command: hermes gateway run
volumes:
hermes-workspace:
name: hermes-workspace
Validate (unchanged): cd ~/projects/hermes && docker compose config --quiet
§2. Start + verify (from ~/projects/hermes):
docker compose up -d && sleep 8
docker logs hermes 2>&1 | grep -v "s6-log: fatal" | tail -10
curl -s -o /dev/null -w "dashboard HTTP %{http_code}\n" http://127.0.0.1:9119/
Confirm: gateway log shows ✓ telegram connected and Gateway running with 1 platform(s); dashboard returns HTTP 200. The dashboard now correctly shows Gateway Status: Running and Telegram as connected.
Note: the runtime log lives at /opt/data/logs/gateway.log inside the container; docker logs hermes shows the s6 supervisor output. The s6-log ... Resource busy spam from the old shared-volume setup is gone.
§3. Pair the user (WAIT):
Ask the user: Message your bot /start in Telegram. It replies with a pairing code — paste it here.
Once you have the code: docker exec hermes hermes pairing approve telegram <PAIRING_CODE>
§4. Write the persona (<DESCRIPTION> is inserted verbatim — make it a complete, capitalized sentence):
docker exec hermes sh -c 'printf "# <AGENT_NAME>\n\nYou are <AGENT_NAME>, my personal AI assistant. <DESCRIPTION>\n" > /opt/data/SOUL.md'
docker compose restart hermes
§5. Tell the user: Your agent is live. Dashboard: http://127.0.0.1:9119
```
::tab[Discord]
```wrap
Set up Hermes in Docker connected to Discord, using Claude (Anthropic) as the AI model.
For an AI agent doing this setup: run every command yourself — never tell the user to open a terminal. Ask the user only for the §0 inputs and in-app actions (adding the bot to the server, opening the dashboard). Credentials go into compose.yaml — don't write them anywhere else. WAIT = hard gate.
§0. Ask the user (WAIT for all four before continuing):
1. Anthropic API key — sk-ant-... from console.anthropic.com → API Keys.
2. Discord bot token — discord.com/developers/applications → New Application → Bot → Reset Token (copy it). Enable Message Content Intent. OAuth2 URL Generator: scope bot, permissions Send Messages / Read Message History / View Channels → paste the URL in browser → authorize for their server. Then paste the bot token here.
3. Agent name — something short (e.g. "Scout").
4. Agent description — a complete sentence: who the user is + how to behave.
§1. Write ~/projects/hermes/compose.yaml (substitute real values for <...>):
services:
hermes:
image: nousresearch/hermes-agent:latest
container_name: hermes
restart: unless-stopped
volumes:
- hermes-workspace:/opt/data
ports:
- "127.0.0.1:9119:9119"
environment:
- ANTHROPIC_API_KEY=<ANTHROPIC_API_KEY>
- DISCORD_BOT_TOKEN=<DISCORD_BOT_TOKEN>
- HERMES_DASHBOARD=true
- HERMES_DASHBOARD_HOST=0.0.0.0
- HERMES_DASHBOARD_PORT=9119
- HERMES_DASHBOARD_INSECURE=true
command: hermes gateway run
volumes:
hermes-workspace:
name: hermes-workspace
Validate (unchanged): cd ~/projects/hermes && docker compose config --quiet
§2. Start + verify (from ~/projects/hermes):
docker compose up -d && sleep 8
docker logs hermes 2>&1 | grep -v "s6-log: fatal" | tail -10
curl -s -o /dev/null -w "dashboard HTTP %{http_code}\n" http://127.0.0.1:9119/
Confirm: gateway log shows ✓ discord connected and Gateway running with 1 platform(s); dashboard returns HTTP 200. The dashboard now correctly shows Gateway Status: Running and Discord as connected.
Note: the runtime log lives at /opt/data/logs/gateway.log inside the container; docker logs hermes shows the s6 supervisor output. The s6-log ... Resource busy spam from the old shared-volume setup is gone.
§3. Write the persona (<DESCRIPTION> is inserted verbatim — make it a complete, capitalized sentence):
docker exec hermes sh -c 'printf "# <AGENT_NAME>\n\nYou are <AGENT_NAME>, my personal AI assistant. <DESCRIPTION>\n" > /opt/data/SOUL.md'
docker compose restart hermes
§4. Tell the user: Your agent is live. Dashboard: http://127.0.0.1:9119
```
:::
::::
::tab[ChatGPT]
Have your **OpenAI API key** ready — get one at [platform.openai.com](https://platform.openai.com). If you have a ChatGPT Plus or Pro subscription you can use OAuth instead — no separate key needed.
::::tabs
::tab[OpenClaw]
:::tabs
::tab[Telegram]
```wrap
Set up OpenClaw in Docker connected to Telegram, using ChatGPT (OpenAI) as the AI model.
For an AI agent doing this setup: run every command yourself — never tell the user to open a terminal. Ask the user only for the §0 inputs, the §4 pairing code, and in-app actions (messaging the bot, opening the dashboard). Hold secrets in memory only. WAIT = hard gate.
§0. Ask the user (WAIT for all four before continuing):
1. OpenAI API key — from platform.openai.com. (Or tell me if using ChatGPT OAuth — no key needed for that path.)
2. Telegram bot token — @BotFather → /newbot → name + ...bot username.
3. Agent name — something short (e.g. "Scout").
4. Agent description — a complete sentence: who the user is + how to behave.
§1. Write ~/projects/openclaw/compose.yaml:
services:
openclaw:
image: ghcr.io/openclaw/openclaw:latest
container_name: openclaw
volumes:
- openclaw-workspace:/workspace
environment:
- OPENCLAW_WORKSPACE=/workspace
- OPENCLAW_STATE_DIR=/workspace/.openclaw
stdin_open: true
tty: true
openclaw-gateway:
image: ghcr.io/openclaw/openclaw:latest
container_name: openclaw-gateway
restart: unless-stopped
volumes:
- openclaw-workspace:/workspace
environment:
- OPENCLAW_WORKSPACE=/workspace
- OPENCLAW_STATE_DIR=/workspace/.openclaw
ports:
- "127.0.0.1:18789:18789"
command: openclaw gateway run --bind lan
volumes:
openclaw-workspace:
name: openclaw-workspace
Validate: cd ~/projects/openclaw && docker compose config --quiet
§2. Run setup (from ~/projects/openclaw; substitute real values for <...>):
# Fix volume ownership first — a fresh named volume is root-owned but the container runs as uid 1000; skip this and onboarding fails with EACCES.
docker run --rm --user root -v openclaw-workspace:/workspace ghcr.io/openclaw/openclaw:latest chown -R 1000:1000 /workspace
# Auth + workspace
docker compose run --rm openclaw openclaw onboard --non-interactive --accept-risk --flow quickstart --auth-choice apiKey --openai-api-key '<OPENAI_API_KEY>' --workspace /workspace --skip-channels --skip-search --skip-skills --skip-hooks --no-install-daemon --skip-health
# Telegram channel
docker compose run --rm openclaw openclaw channels add --channel telegram --token '<TELEGRAM_BOT_TOKEN>' --name '<AGENT_NAME>'
# Model — must be in this build's catalog; an off-catalog id sets silently but fails at runtime with "Unknown model". Check options: docker compose run --rm openclaw openclaw models list
docker compose run --rm openclaw openclaw models set openai/gpt-4o-mini
# Web search + session-memory
docker compose run --rm openclaw openclaw plugins enable duckduckgo
docker compose run --rm openclaw openclaw hooks enable session-memory
§3. Start + verify:
docker compose up -d openclaw-gateway && sleep 6
docker exec openclaw-gateway openclaw models status
docker logs openclaw-gateway 2>&1 | grep -i "unknown model" && echo "BAD: model not in catalog"
curl -s -o /dev/null -w "dashboard HTTP %{http_code}\n" http://127.0.0.1:18789/
Telegram shows running, disconnected until pairing — that's normal.
§4. Pair the user (WAIT):
Ask the user: Message your bot /start in Telegram. It replies with a pairing code — paste it here.
Once you have the code: docker exec openclaw-gateway openclaw pairing approve telegram <PAIRING_CODE>
§5. Write the persona (<DESCRIPTION> is inserted verbatim — make it a complete, capitalized sentence):
docker exec openclaw-gateway sh -c 'printf "# <AGENT_NAME>\n\nYou are <AGENT_NAME>, my personal AI assistant. <DESCRIPTION>\n" > /workspace/SOUL.md'
docker compose restart openclaw-gateway
§6. Give the user the dashboard URL — the UI is token-gated. Read the token:
docker exec openclaw-gateway sh -c 'node -e "console.log(require(process.env.OPENCLAW_STATE_DIR+\"/openclaw.json\").gateway.auth.token)"'
Tell the user: Your agent is live. Open this (logs you in automatically; keep it private): http://127.0.0.1:18789/#token=<GATEWAY_TOKEN>
```
::tab[Discord]
```wrap
Set up OpenClaw in Docker connected to Discord, using ChatGPT (OpenAI) as the AI model.
For an AI agent doing this setup: run every command yourself — never tell the user to open a terminal. Ask the user only for the §0 inputs and in-app actions (adding the bot to the server, opening the dashboard). Credentials go into compose.yaml — don't write them anywhere else. WAIT = hard gate.
§0. Ask the user (WAIT for all four before continuing):
1. OpenAI API key — from platform.openai.com. (Or tell me if using ChatGPT OAuth — no key needed for that path.)
2. Discord bot token — discord.com/developers/applications → New Application → Bot → Reset Token (copy it). Enable Message Content Intent. OAuth2 URL Generator: scope bot, permissions Send Messages / Read Message History / View Channels → paste the URL in browser → authorize for their server. Then paste the bot token here.
3. Agent name — something short (e.g. "Scout").
4. Agent description — a complete sentence: who the user is + how to behave.
§1. Write ~/projects/openclaw/compose.yaml:
services:
openclaw:
image: ghcr.io/openclaw/openclaw:latest
container_name: openclaw
volumes:
- openclaw-workspace:/workspace
environment:
- OPENCLAW_WORKSPACE=/workspace
- OPENCLAW_STATE_DIR=/workspace/.openclaw
stdin_open: true
tty: true
openclaw-gateway:
image: ghcr.io/openclaw/openclaw:latest
container_name: openclaw-gateway
restart: unless-stopped
volumes:
- openclaw-workspace:/workspace
environment:
- OPENCLAW_WORKSPACE=/workspace
- OPENCLAW_STATE_DIR=/workspace/.openclaw
ports:
- "127.0.0.1:18789:18789"
command: openclaw gateway run --bind lan
volumes:
openclaw-workspace:
name: openclaw-workspace
Validate: cd ~/projects/openclaw && docker compose config --quiet
§2. Run setup (from ~/projects/openclaw; substitute real values for <...>):
# Fix volume ownership first — a fresh named volume is root-owned but the container runs as uid 1000; skip this and onboarding fails with EACCES.
docker run --rm --user root -v openclaw-workspace:/workspace ghcr.io/openclaw/openclaw:latest chown -R 1000:1000 /workspace
# Auth + workspace
docker compose run --rm openclaw openclaw onboard --non-interactive --accept-risk --flow quickstart --auth-choice apiKey --openai-api-key '<OPENAI_API_KEY>' --workspace /workspace --skip-channels --skip-search --skip-skills --skip-hooks --no-install-daemon --skip-health
# Discord channel
docker compose run --rm openclaw openclaw channels add --channel discord --token '<DISCORD_BOT_TOKEN>' --name '<AGENT_NAME>'
# Model — must be in this build's catalog; an off-catalog id sets silently but fails at runtime with "Unknown model". Check options: docker compose run --rm openclaw openclaw models list
docker compose run --rm openclaw openclaw models set openai/gpt-4o-mini
# Web search + session-memory
docker compose run --rm openclaw openclaw plugins enable duckduckgo
docker compose run --rm openclaw openclaw hooks enable session-memory
§3. Start + verify:
docker compose up -d openclaw-gateway && sleep 6
docker exec openclaw-gateway openclaw models status
docker logs openclaw-gateway 2>&1 | grep -i "unknown model" && echo "BAD: model not in catalog"
curl -s -o /dev/null -w "dashboard HTTP %{http_code}\n" http://127.0.0.1:18789/
§4. Write the persona (<DESCRIPTION> is inserted verbatim — make it a complete, capitalized sentence):
docker exec openclaw-gateway sh -c 'printf "# <AGENT_NAME>\n\nYou are <AGENT_NAME>, my personal AI assistant. <DESCRIPTION>\n" > /workspace/SOUL.md'
docker compose restart openclaw-gateway
§5. Give the user the dashboard URL — the UI is token-gated. Read the token:
docker exec openclaw-gateway sh -c 'node -e "console.log(require(process.env.OPENCLAW_STATE_DIR+\"/openclaw.json\").gateway.auth.token)"'
Tell the user: Your agent is live. Open this (logs you in automatically; keep it private): http://127.0.0.1:18789/#token=<GATEWAY_TOKEN>
```
:::
::tab[Hermes]
:::tabs
::tab[Telegram]
```wrap
Set up Hermes in Docker connected to Telegram, using ChatGPT (OpenAI) as the AI model.
For an AI agent doing this setup: run every command yourself — never tell the user to open a terminal. Ask the user only for the §0 inputs and in-app actions (messaging the bot, opening the dashboard). Credentials go into compose.yaml — don't write them anywhere else. WAIT = hard gate.
§0. Ask the user (WAIT for all four before continuing):
1. OpenAI API key — from platform.openai.com.
2. Telegram bot token — @BotFather → /newbot → name + ...bot username.
3. Agent name — something short (e.g. "Scout").
4. Agent description — a complete sentence: who the user is + how to behave.
§1. Write ~/projects/hermes/compose.yaml (substitute real values for <...>):
services:
hermes:
image: nousresearch/hermes-agent:latest
container_name: hermes
restart: unless-stopped
volumes:
- hermes-workspace:/opt/data
ports:
- "127.0.0.1:9119:9119"
environment:
- OPENAI_API_KEY=<OPENAI_API_KEY>
- TELEGRAM_BOT_TOKEN=<TELEGRAM_BOT_TOKEN>
- HERMES_DASHBOARD=true
- HERMES_DASHBOARD_HOST=0.0.0.0
- HERMES_DASHBOARD_PORT=9119
- HERMES_DASHBOARD_INSECURE=true
command: hermes gateway run
volumes:
hermes-workspace:
name: hermes-workspace
Validate (unchanged): cd ~/projects/hermes && docker compose config --quiet
§2. Start + verify (from ~/projects/hermes):
docker compose up -d && sleep 8
docker logs hermes 2>&1 | grep -v "s6-log: fatal" | tail -10
curl -s -o /dev/null -w "dashboard HTTP %{http_code}\n" http://127.0.0.1:9119/
Confirm: gateway log shows ✓ telegram connected and Gateway running with 1 platform(s); dashboard returns HTTP 200. The dashboard now correctly shows Gateway Status: Running and Telegram as connected.
Note: the runtime log lives at /opt/data/logs/gateway.log inside the container; docker logs hermes shows the s6 supervisor output. The s6-log ... Resource busy spam from the old shared-volume setup is gone.
§3. Pair the user (WAIT):
Ask the user: Message your bot /start in Telegram. It replies with a pairing code — paste it here.
Once you have the code: docker exec hermes hermes pairing approve telegram <PAIRING_CODE>
§4. Write the persona (<DESCRIPTION> is inserted verbatim — make it a complete, capitalized sentence):
docker exec hermes sh -c 'printf "# <AGENT_NAME>\n\nYou are <AGENT_NAME>, my personal AI assistant. <DESCRIPTION>\n" > /opt/data/SOUL.md'
docker compose restart hermes
§5. Tell the user: Your agent is live. Dashboard: http://127.0.0.1:9119
```
::tab[Discord]
```wrap
Set up Hermes in Docker connected to Discord, using ChatGPT (OpenAI) as the AI model.
For an AI agent doing this setup: run every command yourself — never tell the user to open a terminal. Ask the user only for the §0 inputs and in-app actions (adding the bot to the server, opening the dashboard). Credentials go into compose.yaml — don't write them anywhere else. WAIT = hard gate.
§0. Ask the user (WAIT for all four before continuing):
1. OpenAI API key — from platform.openai.com.
2. Discord bot token — discord.com/developers/applications → New Application → Bot → Reset Token (copy it). Enable Message Content Intent. OAuth2 URL Generator: scope bot, permissions Send Messages / Read Message History / View Channels → paste the URL in browser → authorize for their server. Then paste the bot token here.
3. Agent name — something short (e.g. "Scout").
4. Agent description — a complete sentence: who the user is + how to behave.
§1. Write ~/projects/hermes/compose.yaml (substitute real values for <...>):
services:
hermes:
image: nousresearch/hermes-agent:latest
container_name: hermes
restart: unless-stopped
volumes:
- hermes-workspace:/opt/data
ports:
- "127.0.0.1:9119:9119"
environment:
- OPENAI_API_KEY=<OPENAI_API_KEY>
- DISCORD_BOT_TOKEN=<DISCORD_BOT_TOKEN>
- HERMES_DASHBOARD=true
- HERMES_DASHBOARD_HOST=0.0.0.0
- HERMES_DASHBOARD_PORT=9119
- HERMES_DASHBOARD_INSECURE=true
command: hermes gateway run
volumes:
hermes-workspace:
name: hermes-workspace
Validate (unchanged): cd ~/projects/hermes && docker compose config --quiet
§2. Start + verify (from ~/projects/hermes):
docker compose up -d && sleep 8
docker logs hermes 2>&1 | grep -v "s6-log: fatal" | tail -10
curl -s -o /dev/null -w "dashboard HTTP %{http_code}\n" http://127.0.0.1:9119/
Confirm: gateway log shows ✓ discord connected and Gateway running with 1 platform(s); dashboard returns HTTP 200. The dashboard now correctly shows Gateway Status: Running and Discord as connected.
Note: the runtime log lives at /opt/data/logs/gateway.log inside the container; docker logs hermes shows the s6 supervisor output. The s6-log ... Resource busy spam from the old shared-volume setup is gone.
§3. Write the persona (<DESCRIPTION> is inserted verbatim — make it a complete, capitalized sentence):
docker exec hermes sh -c 'printf "# <AGENT_NAME>\n\nYou are <AGENT_NAME>, my personal AI assistant. <DESCRIPTION>\n" > /opt/data/SOUL.md'
docker compose restart hermes
§4. Tell the user: Your agent is live. Dashboard: http://127.0.0.1:9119
```
:::
::::
::tab[Gemini]
Have your **Gemini API key** ready — get one free at [aistudio.google.com](https://aistudio.google.com) (no billing required for the free tier).
::::tabs
::tab[OpenClaw]
:::tabs
::tab[Telegram]
```wrap
Set up OpenClaw in Docker connected to Telegram, using Gemini (Google) as the AI model.
For an AI agent doing this setup: run every command yourself — never tell the user to open a terminal. Ask the user only for the §0 inputs, the §4 pairing code, and in-app actions (messaging the bot, opening the dashboard). Hold secrets in memory only. WAIT = hard gate.
§0. Ask the user (WAIT for all four before continuing):
1. Gemini API key — free at aistudio.google.com (no billing required for the free tier).
2. Telegram bot token — @BotFather → /newbot → name + ...bot username.
3. Agent name — something short (e.g. "Scout").
4. Agent description — a complete sentence: who the user is + how to behave.
§1. Write ~/projects/openclaw/compose.yaml:
services:
openclaw:
image: ghcr.io/openclaw/openclaw:latest
container_name: openclaw
volumes:
- openclaw-workspace:/workspace
environment:
- OPENCLAW_WORKSPACE=/workspace
- OPENCLAW_STATE_DIR=/workspace/.openclaw
stdin_open: true
tty: true
openclaw-gateway:
image: ghcr.io/openclaw/openclaw:latest
container_name: openclaw-gateway
restart: unless-stopped
volumes:
- openclaw-workspace:/workspace
environment:
- OPENCLAW_WORKSPACE=/workspace
- OPENCLAW_STATE_DIR=/workspace/.openclaw
ports:
- "127.0.0.1:18789:18789"
command: openclaw gateway run --bind lan
volumes:
openclaw-workspace:
name: openclaw-workspace
Validate: cd ~/projects/openclaw && docker compose config --quiet
§2. Run setup (from ~/projects/openclaw; substitute real values for <...>):
# Fix volume ownership first — a fresh named volume is root-owned but the container runs as uid 1000; skip this and onboarding fails with EACCES.
docker run --rm --user root -v openclaw-workspace:/workspace ghcr.io/openclaw/openclaw:latest chown -R 1000:1000 /workspace
# Auth + workspace
docker compose run --rm openclaw openclaw onboard --non-interactive --accept-risk --flow quickstart --auth-choice apiKey --gemini-api-key '<GEMINI_API_KEY>' --workspace /workspace --skip-channels --skip-search --skip-skills --skip-hooks --no-install-daemon --skip-health
# Telegram channel
docker compose run --rm openclaw openclaw channels add --channel telegram --token '<TELEGRAM_BOT_TOKEN>' --name '<AGENT_NAME>'
# Model — must be in this build's catalog; an off-catalog id sets silently but fails at runtime with "Unknown model". Check options: docker compose run --rm openclaw openclaw models list
docker compose run --rm openclaw openclaw models set google/gemini-2.5-flash
# Web search + session-memory
docker compose run --rm openclaw openclaw plugins enable duckduckgo
docker compose run --rm openclaw openclaw hooks enable session-memory
§3. Start + verify:
docker compose up -d openclaw-gateway && sleep 6
docker exec openclaw-gateway openclaw models status
docker logs openclaw-gateway 2>&1 | grep -i "unknown model" && echo "BAD: model not in catalog"
curl -s -o /dev/null -w "dashboard HTTP %{http_code}\n" http://127.0.0.1:18789/
Telegram shows running, disconnected until pairing — that's normal.
§4. Pair the user (WAIT):
Ask the user: Message your bot /start in Telegram. It replies with a pairing code — paste it here.
Once you have the code: docker exec openclaw-gateway openclaw pairing approve telegram <PAIRING_CODE>
§5. Write the persona (<DESCRIPTION> is inserted verbatim — make it a complete, capitalized sentence):
docker exec openclaw-gateway sh -c 'printf "# <AGENT_NAME>\n\nYou are <AGENT_NAME>, my personal AI assistant. <DESCRIPTION>\n" > /workspace/SOUL.md'
docker compose restart openclaw-gateway
§6. Give the user the dashboard URL — the UI is token-gated. Read the token:
docker exec openclaw-gateway sh -c 'node -e "console.log(require(process.env.OPENCLAW_STATE_DIR+\"/openclaw.json\").gateway.auth.token)"'
Tell the user: Your agent is live. Open this (logs you in automatically; keep it private): http://127.0.0.1:18789/#token=<GATEWAY_TOKEN>
```
::tab[Discord]
```wrap
Set up OpenClaw in Docker connected to Discord, using Gemini (Google) as the AI model.
For an AI agent doing this setup: run every command yourself — never tell the user to open a terminal. Ask the user only for the §0 inputs and in-app actions (adding the bot to the server, opening the dashboard). Credentials go into compose.yaml — don't write them anywhere else. WAIT = hard gate.
§0. Ask the user (WAIT for all four before continuing):
1. Gemini API key — free at aistudio.google.com (no billing required for the free tier).
2. Discord bot token — discord.com/developers/applications → New Application → Bot → Reset Token (copy it). Enable Message Content Intent. OAuth2 URL Generator: scope bot, permissions Send Messages / Read Message History / View Channels → paste the URL in browser → authorize for their server. Then paste the bot token here.
3. Agent name — something short (e.g. "Scout").
4. Agent description — a complete sentence: who the user is + how to behave.
§1. Write ~/projects/openclaw/compose.yaml:
services:
openclaw:
image: ghcr.io/openclaw/openclaw:latest
container_name: openclaw
volumes:
- openclaw-workspace:/workspace
environment:
- OPENCLAW_WORKSPACE=/workspace
- OPENCLAW_STATE_DIR=/workspace/.openclaw
stdin_open: true
tty: true
openclaw-gateway:
image: ghcr.io/openclaw/openclaw:latest
container_name: openclaw-gateway
restart: unless-stopped
volumes:
- openclaw-workspace:/workspace
environment:
- OPENCLAW_WORKSPACE=/workspace
- OPENCLAW_STATE_DIR=/workspace/.openclaw
ports:
- "127.0.0.1:18789:18789"
command: openclaw gateway run --bind lan
volumes:
openclaw-workspace:
name: openclaw-workspace
Validate: cd ~/projects/openclaw && docker compose config --quiet
§2. Run setup (from ~/projects/openclaw; substitute real values for <...>):
# Fix volume ownership first — a fresh named volume is root-owned but the container runs as uid 1000; skip this and onboarding fails with EACCES.
docker run --rm --user root -v openclaw-workspace:/workspace ghcr.io/openclaw/openclaw:latest chown -R 1000:1000 /workspace
# Auth + workspace
docker compose run --rm openclaw openclaw onboard --non-interactive --accept-risk --flow quickstart --auth-choice apiKey --gemini-api-key '<GEMINI_API_KEY>' --workspace /workspace --skip-channels --skip-search --skip-skills --skip-hooks --no-install-daemon --skip-health
# Discord channel
docker compose run --rm openclaw openclaw channels add --channel discord --token '<DISCORD_BOT_TOKEN>' --name '<AGENT_NAME>'
# Model — must be in this build's catalog; an off-catalog id sets silently but fails at runtime with "Unknown model". Check options: docker compose run --rm openclaw openclaw models list
docker compose run --rm openclaw openclaw models set google/gemini-2.5-flash
# Web search + session-memory
docker compose run --rm openclaw openclaw plugins enable duckduckgo
docker compose run --rm openclaw openclaw hooks enable session-memory
§3. Start + verify:
docker compose up -d openclaw-gateway && sleep 6
docker exec openclaw-gateway openclaw models status
docker logs openclaw-gateway 2>&1 | grep -i "unknown model" && echo "BAD: model not in catalog"
curl -s -o /dev/null -w "dashboard HTTP %{http_code}\n" http://127.0.0.1:18789/
§4. Write the persona (<DESCRIPTION> is inserted verbatim — make it a complete, capitalized sentence):
docker exec openclaw-gateway sh -c 'printf "# <AGENT_NAME>\n\nYou are <AGENT_NAME>, my personal AI assistant. <DESCRIPTION>\n" > /workspace/SOUL.md'
docker compose restart openclaw-gateway
§5. Give the user the dashboard URL — the UI is token-gated. Read the token:
docker exec openclaw-gateway sh -c 'node -e "console.log(require(process.env.OPENCLAW_STATE_DIR+\"/openclaw.json\").gateway.auth.token)"'
Tell the user: Your agent is live. Open this (logs you in automatically; keep it private): http://127.0.0.1:18789/#token=<GATEWAY_TOKEN>
```
:::
::tab[Hermes]
:::tabs
::tab[Telegram]
```wrap
Set up Hermes in Docker connected to Telegram, using Gemini (Google) as the AI model.
For an AI agent doing this setup: run every command yourself — never tell the user to open a terminal. Ask the user only for the §0 inputs and in-app actions (messaging the bot, opening the dashboard). Credentials go into compose.yaml — don't write them anywhere else. WAIT = hard gate.
§0. Ask the user (WAIT for all four before continuing):
1. Gemini API key — free at aistudio.google.com (no billing required for the free tier).
2. Telegram bot token — @BotFather → /newbot → name + ...bot username.
3. Agent name — something short (e.g. "Scout").
4. Agent description — a complete sentence: who the user is + how to behave.
§1. Write ~/projects/hermes/compose.yaml (substitute real values for <...>):
services:
hermes:
image: nousresearch/hermes-agent:latest
container_name: hermes
restart: unless-stopped
volumes:
- hermes-workspace:/opt/data
ports:
- "127.0.0.1:9119:9119"
environment:
- GOOGLE_API_KEY=<GOOGLE_API_KEY>
- TELEGRAM_BOT_TOKEN=<TELEGRAM_BOT_TOKEN>
- HERMES_DASHBOARD=true
- HERMES_DASHBOARD_HOST=0.0.0.0
- HERMES_DASHBOARD_PORT=9119
- HERMES_DASHBOARD_INSECURE=true
command: hermes gateway run
volumes:
hermes-workspace:
name: hermes-workspace
Validate (unchanged): cd ~/projects/hermes && docker compose config --quiet
§2. Start + verify (from ~/projects/hermes):
docker compose up -d && sleep 8
docker logs hermes 2>&1 | grep -v "s6-log: fatal" | tail -10
curl -s -o /dev/null -w "dashboard HTTP %{http_code}\n" http://127.0.0.1:9119/
Confirm: gateway log shows ✓ telegram connected and Gateway running with 1 platform(s); dashboard returns HTTP 200. The dashboard now correctly shows Gateway Status: Running and Telegram as connected.
Note: the runtime log lives at /opt/data/logs/gateway.log inside the container; docker logs hermes shows the s6 supervisor output. The s6-log ... Resource busy spam from the old shared-volume setup is gone.
§3. Pair the user (WAIT):
Ask the user: Message your bot /start in Telegram. It replies with a pairing code — paste it here.
Once you have the code: docker exec hermes hermes pairing approve telegram <PAIRING_CODE>
§4. Write the persona (<DESCRIPTION> is inserted verbatim — make it a complete, capitalized sentence):
docker exec hermes sh -c 'printf "# <AGENT_NAME>\n\nYou are <AGENT_NAME>, my personal AI assistant. <DESCRIPTION>\n" > /opt/data/SOUL.md'
docker compose restart hermes
§5. Tell the user: Your agent is live. Dashboard: http://127.0.0.1:9119
```
::tab[Discord]
```wrap
Set up Hermes in Docker connected to Discord, using Gemini (Google) as the AI model.
For an AI agent doing this setup: run every command yourself — never tell the user to open a terminal. Ask the user only for the §0 inputs and in-app actions (adding the bot to the server, opening the dashboard). Credentials go into compose.yaml — don't write them anywhere else. WAIT = hard gate.
§0. Ask the user (WAIT for all four before continuing):
1. Gemini API key — free at aistudio.google.com (no billing required for the free tier).
2. Discord bot token — discord.com/developers/applications → New Application → Bot → Reset Token (copy it). Enable Message Content Intent. OAuth2 URL Generator: scope bot, permissions Send Messages / Read Message History / View Channels → paste the URL in browser → authorize for their server. Then paste the bot token here.
3. Agent name — something short (e.g. "Scout").
4. Agent description — a complete sentence: who the user is + how to behave.
§1. Write ~/projects/hermes/compose.yaml (substitute real values for <...>):
services:
hermes:
image: nousresearch/hermes-agent:latest
container_name: hermes
restart: unless-stopped
volumes:
- hermes-workspace:/opt/data
ports:
- "127.0.0.1:9119:9119"
environment:
- GOOGLE_API_KEY=<GOOGLE_API_KEY>
- DISCORD_BOT_TOKEN=<DISCORD_BOT_TOKEN>
- HERMES_DASHBOARD=true
- HERMES_DASHBOARD_HOST=0.0.0.0
- HERMES_DASHBOARD_PORT=9119
- HERMES_DASHBOARD_INSECURE=true
command: hermes gateway run
volumes:
hermes-workspace:
name: hermes-workspace
Validate (unchanged): cd ~/projects/hermes && docker compose config --quiet
§2. Start + verify (from ~/projects/hermes):
docker compose up -d && sleep 8
docker logs hermes 2>&1 | grep -v "s6-log: fatal" | tail -10
curl -s -o /dev/null -w "dashboard HTTP %{http_code}\n" http://127.0.0.1:9119/
Confirm: gateway log shows ✓ discord connected and Gateway running with 1 platform(s); dashboard returns HTTP 200. The dashboard now correctly shows Gateway Status: Running and Discord as connected.
Note: the runtime log lives at /opt/data/logs/gateway.log inside the container; docker logs hermes shows the s6 supervisor output. The s6-log ... Resource busy spam from the old shared-volume setup is gone.
§3. Write the persona (<DESCRIPTION> is inserted verbatim — make it a complete, capitalized sentence):
docker exec hermes sh -c 'printf "# <AGENT_NAME>\n\nYou are <AGENT_NAME>, my personal AI assistant. <DESCRIPTION>\n" > /opt/data/SOUL.md'
docker compose restart hermes
§4. Tell the user: Your agent is live. Dashboard: http://127.0.0.1:9119
```
:::
::::
::tab[Open]
Have your **OpenRouter API key** ready — get one free at [openrouter.ai](https://openrouter.ai). One key gives you access to 300+ models; no lock-in.
::::tabs
::tab[OpenClaw]
:::tabs
::tab[Telegram]
```wrap
Set up OpenClaw in Docker connected to Telegram, using OpenRouter as the AI provider.
For an AI agent doing this setup: run every command yourself — never tell the user to open a terminal. Ask the user only for the §0 inputs, the §4 pairing code, and in-app actions (messaging the bot, opening the dashboard). Hold secrets in memory only. WAIT = hard gate.
§0. Ask the user (WAIT for all four before continuing):
1. OpenRouter API key — free at openrouter.ai (one key, 300+ models).
2. Telegram bot token — @BotFather → /newbot → name + ...bot username.
3. Agent name — something short (e.g. "Scout").
4. Agent description — a complete sentence: who the user is + how to behave.
§1. Write ~/projects/openclaw/compose.yaml:
services:
openclaw:
image: ghcr.io/openclaw/openclaw:latest
container_name: openclaw
volumes:
- openclaw-workspace:/workspace
environment:
- OPENCLAW_WORKSPACE=/workspace
- OPENCLAW_STATE_DIR=/workspace/.openclaw
stdin_open: true
tty: true
openclaw-gateway:
image: ghcr.io/openclaw/openclaw:latest
container_name: openclaw-gateway
restart: unless-stopped
volumes:
- openclaw-workspace:/workspace
environment:
- OPENCLAW_WORKSPACE=/workspace
- OPENCLAW_STATE_DIR=/workspace/.openclaw
ports:
- "127.0.0.1:18789:18789"
command: openclaw gateway run --bind lan
volumes:
openclaw-workspace:
name: openclaw-workspace
Validate: cd ~/projects/openclaw && docker compose config --quiet
§2. Run setup (from ~/projects/openclaw; substitute real values for <...>):
# Fix volume ownership first — a fresh named volume is root-owned but the container runs as uid 1000; skip this and onboarding fails with EACCES.
docker run --rm --user root -v openclaw-workspace:/workspace ghcr.io/openclaw/openclaw:latest chown -R 1000:1000 /workspace
# Auth + workspace
docker compose run --rm openclaw openclaw onboard --non-interactive --accept-risk --flow quickstart --auth-choice apiKey --openrouter-api-key '<OPENROUTER_API_KEY>' --workspace /workspace --skip-channels --skip-search --skip-skills --skip-hooks --no-install-daemon --skip-health
# Telegram channel
docker compose run --rm openclaw openclaw channels add --channel telegram --token '<TELEGRAM_BOT_TOKEN>' --name '<AGENT_NAME>'
# Model — must be in this build's catalog; an off-catalog id sets silently but fails at runtime with "Unknown model". Check options: docker compose run --rm openclaw openclaw models list
docker compose run --rm openclaw openclaw models set openrouter/deepseek/deepseek-v4-0324
# Web search + session-memory
docker compose run --rm openclaw openclaw plugins enable duckduckgo
docker compose run --rm openclaw openclaw hooks enable session-memory
§3. Start + verify:
docker compose up -d openclaw-gateway && sleep 6
docker exec openclaw-gateway openclaw models status
docker logs openclaw-gateway 2>&1 | grep -i "unknown model" && echo "BAD: model not in catalog"
curl -s -o /dev/null -w "dashboard HTTP %{http_code}\n" http://127.0.0.1:18789/
Telegram shows running, disconnected until pairing — that's normal.
§4. Pair the user (WAIT):
Ask the user: Message your bot /start in Telegram. It replies with a pairing code — paste it here.
Once you have the code: docker exec openclaw-gateway openclaw pairing approve telegram <PAIRING_CODE>
§5. Write the persona (<DESCRIPTION> is inserted verbatim — make it a complete, capitalized sentence):
docker exec openclaw-gateway sh -c 'printf "# <AGENT_NAME>\n\nYou are <AGENT_NAME>, my personal AI assistant. <DESCRIPTION>\n" > /workspace/SOUL.md'
docker compose restart openclaw-gateway
§6. Give the user the dashboard URL — the UI is token-gated. Read the token:
docker exec openclaw-gateway sh -c 'node -e "console.log(require(process.env.OPENCLAW_STATE_DIR+\"/openclaw.json\").gateway.auth.token)"'
Tell the user: Your agent is live. Open this (logs you in automatically; keep it private): http://127.0.0.1:18789/#token=<GATEWAY_TOKEN>
```
::tab[Discord]
```wrap
Set up OpenClaw in Docker connected to Discord, using OpenRouter as the AI provider.
For an AI agent doing this setup: run every command yourself — never tell the user to open a terminal. Ask the user only for the §0 inputs and in-app actions (adding the bot to the server, opening the dashboard). Credentials go into compose.yaml — don't write them anywhere else. WAIT = hard gate.
§0. Ask the user (WAIT for all four before continuing):
1. OpenRouter API key — free at openrouter.ai (one key, 300+ models).
2. Discord bot token — discord.com/developers/applications → New Application → Bot → Reset Token (copy it). Enable Message Content Intent. OAuth2 URL Generator: scope bot, permissions Send Messages / Read Message History / View Channels → paste the URL in browser → authorize for their server. Then paste the bot token here.
3. Agent name — something short (e.g. "Scout").
4. Agent description — a complete sentence: who the user is + how to behave.
§1. Write ~/projects/openclaw/compose.yaml:
services:
openclaw:
image: ghcr.io/openclaw/openclaw:latest
container_name: openclaw
volumes:
- openclaw-workspace:/workspace
environment:
- OPENCLAW_WORKSPACE=/workspace
- OPENCLAW_STATE_DIR=/workspace/.openclaw
stdin_open: true
tty: true
openclaw-gateway:
image: ghcr.io/openclaw/openclaw:latest
container_name: openclaw-gateway
restart: unless-stopped
volumes:
- openclaw-workspace:/workspace
environment:
- OPENCLAW_WORKSPACE=/workspace
- OPENCLAW_STATE_DIR=/workspace/.openclaw
ports:
- "127.0.0.1:18789:18789"
command: openclaw gateway run --bind lan
volumes:
openclaw-workspace:
name: openclaw-workspace
Validate: cd ~/projects/openclaw && docker compose config --quiet
§2. Run setup (from ~/projects/openclaw; substitute real values for <...>):
# Fix volume ownership first — a fresh named volume is root-owned but the container runs as uid 1000; skip this and onboarding fails with EACCES.
docker run --rm --user root -v openclaw-workspace:/workspace ghcr.io/openclaw/openclaw:latest chown -R 1000:1000 /workspace
# Auth + workspace
docker compose run --rm openclaw openclaw onboard --non-interactive --accept-risk --flow quickstart --auth-choice apiKey --openrouter-api-key '<OPENROUTER_API_KEY>' --workspace /workspace --skip-channels --skip-search --skip-skills --skip-hooks --no-install-daemon --skip-health
# Discord channel
docker compose run --rm openclaw openclaw channels add --channel discord --token '<DISCORD_BOT_TOKEN>' --name '<AGENT_NAME>'
# Model — must be in this build's catalog; an off-catalog id sets silently but fails at runtime with "Unknown model". Check options: docker compose run --rm openclaw openclaw models list
docker compose run --rm openclaw openclaw models set openrouter/deepseek/deepseek-v4-0324
# Web search + session-memory
docker compose run --rm openclaw openclaw plugins enable duckduckgo
docker compose run --rm openclaw openclaw hooks enable session-memory
§3. Start + verify:
docker compose up -d openclaw-gateway && sleep 6
docker exec openclaw-gateway openclaw models status
docker logs openclaw-gateway 2>&1 | grep -i "unknown model" && echo "BAD: model not in catalog"
curl -s -o /dev/null -w "dashboard HTTP %{http_code}\n" http://127.0.0.1:18789/
§4. Write the persona (<DESCRIPTION> is inserted verbatim — make it a complete, capitalized sentence):
docker exec openclaw-gateway sh -c 'printf "# <AGENT_NAME>\n\nYou are <AGENT_NAME>, my personal AI assistant. <DESCRIPTION>\n" > /workspace/SOUL.md'
docker compose restart openclaw-gateway
§5. Give the user the dashboard URL — the UI is token-gated. Read the token:
docker exec openclaw-gateway sh -c 'node -e "console.log(require(process.env.OPENCLAW_STATE_DIR+\"/openclaw.json\").gateway.auth.token)"'
Tell the user: Your agent is live. Open this (logs you in automatically; keep it private): http://127.0.0.1:18789/#token=<GATEWAY_TOKEN>
```
:::
::tab[Hermes]
:::tabs
::tab[Telegram]
```wrap
Set up Hermes in Docker connected to Telegram, using OpenRouter as the AI provider.
For an AI agent doing this setup: run every command yourself — never tell the user to open a terminal. Ask the user only for the §0 inputs and in-app actions (messaging the bot, opening the dashboard). Credentials go into compose.yaml — don't write them anywhere else. WAIT = hard gate.
§0. Ask the user (WAIT for all four before continuing):
1. OpenRouter API key — free at openrouter.ai (one key, 300+ models).
2. Telegram bot token — @BotFather → /newbot → name + ...bot username.
3. Agent name — something short (e.g. "Scout").
4. Agent description — a complete sentence: who the user is + how to behave.
§1. Write ~/projects/hermes/compose.yaml (substitute real values for <...>):
services:
hermes:
image: nousresearch/hermes-agent:latest
container_name: hermes
restart: unless-stopped
volumes:
- hermes-workspace:/opt/data
ports:
- "127.0.0.1:9119:9119"
environment:
- OPENROUTER_API_KEY=<OPENROUTER_API_KEY>
- TELEGRAM_BOT_TOKEN=<TELEGRAM_BOT_TOKEN>
- HERMES_DASHBOARD=true
- HERMES_DASHBOARD_HOST=0.0.0.0
- HERMES_DASHBOARD_PORT=9119
- HERMES_DASHBOARD_INSECURE=true
command: hermes gateway run
volumes:
hermes-workspace:
name: hermes-workspace
Validate (unchanged): cd ~/projects/hermes && docker compose config --quiet
§2. Start + verify (from ~/projects/hermes):
docker compose up -d && sleep 8
docker logs hermes 2>&1 | grep -v "s6-log: fatal" | tail -10
curl -s -o /dev/null -w "dashboard HTTP %{http_code}\n" http://127.0.0.1:9119/
Confirm: gateway log shows ✓ telegram connected and Gateway running with 1 platform(s); dashboard returns HTTP 200. The dashboard now correctly shows Gateway Status: Running and Telegram as connected.
Note: the runtime log lives at /opt/data/logs/gateway.log inside the container; docker logs hermes shows the s6 supervisor output. The s6-log ... Resource busy spam from the old shared-volume setup is gone.
§3. Pair the user (WAIT):
Ask the user: Message your bot /start in Telegram. It replies with a pairing code — paste it here.
Once you have the code: docker exec hermes hermes pairing approve telegram <PAIRING_CODE>
§4. Write the persona (<DESCRIPTION> is inserted verbatim — make it a complete, capitalized sentence):
docker exec hermes sh -c 'printf "# <AGENT_NAME>\n\nYou are <AGENT_NAME>, my personal AI assistant. <DESCRIPTION>\n" > /opt/data/SOUL.md'
docker compose restart hermes
§5. Tell the user: Your agent is live. Dashboard: http://127.0.0.1:9119
```
::tab[Discord]
```wrap
Set up Hermes in Docker connected to Discord, using OpenRouter as the AI provider.
For an AI agent doing this setup: run every command yourself — never tell the user to open a terminal. Ask the user only for the §0 inputs and in-app actions (adding the bot to the server, opening the dashboard). Credentials go into compose.yaml — don't write them anywhere else. WAIT = hard gate.
§0. Ask the user (WAIT for all four before continuing):
1. OpenRouter API key — free at openrouter.ai (one key, 300+ models).
2. Discord bot token — discord.com/developers/applications → New Application → Bot → Reset Token (copy it). Enable Message Content Intent. OAuth2 URL Generator: scope bot, permissions Send Messages / Read Message History / View Channels → paste the URL in browser → authorize for their server. Then paste the bot token here.
3. Agent name — something short (e.g. "Scout").
4. Agent description — a complete sentence: who the user is + how to behave.
§1. Write ~/projects/hermes/compose.yaml (substitute real values for <...>):
services:
hermes:
image: nousresearch/hermes-agent:latest
container_name: hermes
restart: unless-stopped
volumes:
- hermes-workspace:/opt/data
ports:
- "127.0.0.1:9119:9119"
environment:
- OPENROUTER_API_KEY=<OPENROUTER_API_KEY>
- DISCORD_BOT_TOKEN=<DISCORD_BOT_TOKEN>
- HERMES_DASHBOARD=true
- HERMES_DASHBOARD_HOST=0.0.0.0
- HERMES_DASHBOARD_PORT=9119
- HERMES_DASHBOARD_INSECURE=true
command: hermes gateway run
volumes:
hermes-workspace:
name: hermes-workspace
Validate (unchanged): cd ~/projects/hermes && docker compose config --quiet
§2. Start + verify (from ~/projects/hermes):
docker compose up -d && sleep 8
docker logs hermes 2>&1 | grep -v "s6-log: fatal" | tail -10
curl -s -o /dev/null -w "dashboard HTTP %{http_code}\n" http://127.0.0.1:9119/
Confirm: gateway log shows ✓ discord connected and Gateway running with 1 platform(s); dashboard returns HTTP 200. The dashboard now correctly shows Gateway Status: Running and Discord as connected.
Note: the runtime log lives at /opt/data/logs/gateway.log inside the container; docker logs hermes shows the s6 supervisor output. The s6-log ... Resource busy spam from the old shared-volume setup is gone.
§3. Write the persona (<DESCRIPTION> is inserted verbatim — make it a complete, capitalized sentence):
docker exec hermes sh -c 'printf "# <AGENT_NAME>\n\nYou are <AGENT_NAME>, my personal AI assistant. <DESCRIPTION>\n" > /opt/data/SOUL.md'
docker compose restart hermes
§4. Tell the user: Your agent is live. Dashboard: http://127.0.0.1:9119
```
:::
::::
::tab[Local]
No API key needed. Make sure **Ollama** is installed and running on your machine — download it at [ollama.com](https://ollama.com/download). Pull the model before starting: `ollama pull qwen3:14b` (16GB RAM minimum; use `deepseek-coder:33b` with 24GB+).
::::tabs
::tab[OpenClaw]
:::tabs
::tab[Telegram]
```wrap
Set up OpenClaw in Docker connected to Telegram, using Ollama (local) as the AI model.
For an AI agent doing this setup: run every command yourself — never tell the user to open a terminal. Ask the user only for the §0 inputs, the §4 pairing code, and in-app actions (messaging the bot, opening the dashboard). Hold secrets in memory only. WAIT = hard gate.
§0. Confirm + ask the user (WAIT for all three before continuing):
0. Confirm Ollama is running (ollama serve) and the model is pulled (ollama pull qwen3:14b).
1. Telegram bot token — @BotFather → /newbot → name + ...bot username.
2. Agent name — something short (e.g. "Scout").
3. Agent description — a complete sentence: who the user is + how to behave.
§1. Write ~/projects/openclaw/compose.yaml:
services:
openclaw:
image: ghcr.io/openclaw/openclaw:latest
container_name: openclaw
volumes:
- openclaw-workspace:/workspace
environment:
- OPENCLAW_WORKSPACE=/workspace
- OPENCLAW_STATE_DIR=/workspace/.openclaw
extra_hosts:
- "host.docker.internal:host-gateway"
stdin_open: true
tty: true
openclaw-gateway:
image: ghcr.io/openclaw/openclaw:latest
container_name: openclaw-gateway
restart: unless-stopped
volumes:
- openclaw-workspace:/workspace
environment:
- OPENCLAW_WORKSPACE=/workspace
- OPENCLAW_STATE_DIR=/workspace/.openclaw
extra_hosts:
- "host.docker.internal:host-gateway"
ports:
- "127.0.0.1:18789:18789"
command: openclaw gateway run --bind lan
volumes:
openclaw-workspace:
name: openclaw-workspace
Validate: cd ~/projects/openclaw && docker compose config --quiet
§2. Run setup (from ~/projects/openclaw; substitute real values for <...>):
# Fix volume ownership first — a fresh named volume is root-owned but the container runs as uid 1000; skip this and onboarding fails with EACCES.
docker run --rm --user root -v openclaw-workspace:/workspace ghcr.io/openclaw/openclaw:latest chown -R 1000:1000 /workspace
# Auth + workspace (no API key for Ollama)
docker compose run --rm openclaw openclaw onboard --non-interactive --accept-risk --flow quickstart --auth-choice none --workspace /workspace --skip-channels --skip-search --skip-skills --skip-hooks --no-install-daemon --skip-health
# Telegram channel
docker compose run --rm openclaw openclaw channels add --channel telegram --token '<TELEGRAM_BOT_TOKEN>' --name '<AGENT_NAME>'
# Ollama endpoint + model
docker compose run --rm openclaw openclaw config set ollama.endpoint http://host.docker.internal:11434
docker compose run --rm openclaw openclaw models set ollama/qwen3:14b
# Web search + session-memory
docker compose run --rm openclaw openclaw plugins enable duckduckgo
docker compose run --rm openclaw openclaw hooks enable session-memory
§3. Start + verify:
docker compose up -d openclaw-gateway && sleep 6
docker exec openclaw-gateway openclaw models status
docker logs openclaw-gateway 2>&1 | grep -i "unknown model" && echo "BAD: model not in catalog"
curl -s -o /dev/null -w "dashboard HTTP %{http_code}\n" http://127.0.0.1:18789/
Telegram shows running, disconnected until pairing — that's normal.
§4. Pair the user (WAIT):
Ask the user: Message your bot /start in Telegram. It replies with a pairing code — paste it here.
Once you have the code: docker exec openclaw-gateway openclaw pairing approve telegram <PAIRING_CODE>
§5. Write the persona (<DESCRIPTION> is inserted verbatim — make it a complete, capitalized sentence):
docker exec openclaw-gateway sh -c 'printf "# <AGENT_NAME>\n\nYou are <AGENT_NAME>, my personal AI assistant. <DESCRIPTION>\n" > /workspace/SOUL.md'
docker compose restart openclaw-gateway
§6. Give the user the dashboard URL — the UI is token-gated. Read the token:
docker exec openclaw-gateway sh -c 'node -e "console.log(require(process.env.OPENCLAW_STATE_DIR+\"/openclaw.json\").gateway.auth.token)"'
Tell the user: Your agent is live. Open this (logs you in automatically; keep it private): http://127.0.0.1:18789/#token=<GATEWAY_TOKEN>
```
::tab[Discord]
```wrap
Set up OpenClaw in Docker connected to Discord, using Ollama (local) as the AI model.
For an AI agent doing this setup: run every command yourself — never tell the user to open a terminal. Ask the user only for the §0 inputs and in-app actions (adding the bot to the server, opening the dashboard). Credentials go into compose.yaml — don't write them anywhere else. WAIT = hard gate.
§0. Confirm + ask the user (WAIT for all three before continuing):
0. Confirm Ollama is running (ollama serve) and the model is pulled (ollama pull qwen3:14b).
1. Discord bot token — discord.com/developers/applications → New Application → Bot → Reset Token (copy it). Enable Message Content Intent. OAuth2 URL Generator: scope bot, permissions Send Messages / Read Message History / View Channels → paste the URL in browser → authorize for their server. Then paste the bot token here.
2. Agent name — something short (e.g. "Scout").
3. Agent description — a complete sentence: who the user is + how to behave.
§1. Write ~/projects/openclaw/compose.yaml:
services:
openclaw:
image: ghcr.io/openclaw/openclaw:latest
container_name: openclaw
volumes:
- openclaw-workspace:/workspace
environment:
- OPENCLAW_WORKSPACE=/workspace
- OPENCLAW_STATE_DIR=/workspace/.openclaw
extra_hosts:
- "host.docker.internal:host-gateway"
stdin_open: true
tty: true
openclaw-gateway:
image: ghcr.io/openclaw/openclaw:latest
container_name: openclaw-gateway
restart: unless-stopped
volumes:
- openclaw-workspace:/workspace
environment:
- OPENCLAW_WORKSPACE=/workspace
- OPENCLAW_STATE_DIR=/workspace/.openclaw
extra_hosts:
- "host.docker.internal:host-gateway"
ports:
- "127.0.0.1:18789:18789"
command: openclaw gateway run --bind lan
volumes:
openclaw-workspace:
name: openclaw-workspace
Validate: cd ~/projects/openclaw && docker compose config --quiet
§2. Run setup (from ~/projects/openclaw; substitute real values for <...>):
# Fix volume ownership first — a fresh named volume is root-owned but the container runs as uid 1000; skip this and onboarding fails with EACCES.
docker run --rm --user root -v openclaw-workspace:/workspace ghcr.io/openclaw/openclaw:latest chown -R 1000:1000 /workspace
# Auth + workspace (no API key for Ollama)
docker compose run --rm openclaw openclaw onboard --non-interactive --accept-risk --flow quickstart --auth-choice none --workspace /workspace --skip-channels --skip-search --skip-skills --skip-hooks --no-install-daemon --skip-health
# Discord channel
docker compose run --rm openclaw openclaw channels add --channel discord --token '<DISCORD_BOT_TOKEN>' --name '<AGENT_NAME>'
# Ollama endpoint + model
docker compose run --rm openclaw openclaw config set ollama.endpoint http://host.docker.internal:11434
docker compose run --rm openclaw openclaw models set ollama/qwen3:14b
# Web search + session-memory
docker compose run --rm openclaw openclaw plugins enable duckduckgo
docker compose run --rm openclaw openclaw hooks enable session-memory
§3. Start + verify:
docker compose up -d openclaw-gateway && sleep 6
docker exec openclaw-gateway openclaw models status
docker logs openclaw-gateway 2>&1 | grep -i "unknown model" && echo "BAD: model not in catalog"
curl -s -o /dev/null -w "dashboard HTTP %{http_code}\n" http://127.0.0.1:18789/
§4. Write the persona (<DESCRIPTION> is inserted verbatim — make it a complete, capitalized sentence):
docker exec openclaw-gateway sh -c 'printf "# <AGENT_NAME>\n\nYou are <AGENT_NAME>, my personal AI assistant. <DESCRIPTION>\n" > /workspace/SOUL.md'
docker compose restart openclaw-gateway
§5. Give the user the dashboard URL — the UI is token-gated. Read the token:
docker exec openclaw-gateway sh -c 'node -e "console.log(require(process.env.OPENCLAW_STATE_DIR+\"/openclaw.json\").gateway.auth.token)"'
Tell the user: Your agent is live. Open this (logs you in automatically; keep it private): http://127.0.0.1:18789/#token=<GATEWAY_TOKEN>
```
:::
::tab[Hermes]
:::tabs
::tab[Telegram]
```wrap
Set up Hermes in Docker connected to Telegram, using Ollama (local) as the AI model.
For an AI agent doing this setup: run every command yourself — never tell the user to open a terminal. Ask the user only for the §0 inputs and in-app actions (messaging the bot, opening the dashboard). Credentials go into compose.yaml — don't write them anywhere else. WAIT = hard gate.
§0. Confirm + ask the user (WAIT for all three before continuing):
0. Confirm Ollama is running (ollama serve) and the model is pulled (ollama pull qwen3:14b).
1. Telegram bot token — @BotFather → /newbot → name + ...bot username.
2. Agent name — something short (e.g. "Scout").
3. Agent description — a complete sentence: who the user is + how to behave.
§1. Write ~/projects/hermes/compose.yaml (substitute real values for <...>):
services:
hermes:
image: nousresearch/hermes-agent:latest
container_name: hermes
restart: unless-stopped
volumes:
- hermes-workspace:/opt/data
ports:
- "127.0.0.1:9119:9119"
environment:
- OLLAMA_BASE_URL=http://host.docker.internal:11434
- TELEGRAM_BOT_TOKEN=<TELEGRAM_BOT_TOKEN>
- HERMES_DASHBOARD=true
- HERMES_DASHBOARD_HOST=0.0.0.0
- HERMES_DASHBOARD_PORT=9119
- HERMES_DASHBOARD_INSECURE=true
extra_hosts:
- "host.docker.internal:host-gateway"
command: hermes gateway run
volumes:
hermes-workspace:
name: hermes-workspace
Validate (unchanged): cd ~/projects/hermes && docker compose config --quiet
§2. Start + verify (from ~/projects/hermes):
docker compose up -d && sleep 8
docker logs hermes 2>&1 | grep -v "s6-log: fatal" | tail -10
curl -s -o /dev/null -w "dashboard HTTP %{http_code}\n" http://127.0.0.1:9119/
Confirm: gateway log shows ✓ telegram connected and Gateway running with 1 platform(s); dashboard returns HTTP 200. The dashboard now correctly shows Gateway Status: Running and Telegram as connected.
Note: the runtime log lives at /opt/data/logs/gateway.log inside the container; docker logs hermes shows the s6 supervisor output. The s6-log ... Resource busy spam from the old shared-volume setup is gone.
§3. Pair the user (WAIT):
Ask the user: Message your bot /start in Telegram. It replies with a pairing code — paste it here.
Once you have the code: docker exec hermes hermes pairing approve telegram <PAIRING_CODE>
§4. Write the persona (<DESCRIPTION> is inserted verbatim — make it a complete, capitalized sentence):
docker exec hermes sh -c 'printf "# <AGENT_NAME>\n\nYou are <AGENT_NAME>, my personal AI assistant. <DESCRIPTION>\n" > /opt/data/SOUL.md'
docker compose restart hermes
§5. Tell the user: Your agent is live. Dashboard: http://127.0.0.1:9119
```
::tab[Discord]
```wrap
Set up Hermes in Docker connected to Discord, using Ollama (local) as the AI model.
For an AI agent doing this setup: run every command yourself — never tell the user to open a terminal. Ask the user only for the §0 inputs and in-app actions (adding the bot to the server, opening the dashboard). Credentials go into compose.yaml — don't write them anywhere else. WAIT = hard gate.
§0. Confirm + ask the user (WAIT for all three before continuing):
0. Confirm Ollama is running (ollama serve) and the model is pulled (ollama pull qwen3:14b).
1. Discord bot token — discord.com/developers/applications → New Application → Bot → Reset Token (copy it). Enable Message Content Intent. OAuth2 URL Generator: scope bot, permissions Send Messages / Read Message History / View Channels → paste the URL in browser → authorize for their server. Then paste the bot token here.
2. Agent name — something short (e.g. "Scout").
3. Agent description — a complete sentence: who the user is + how to behave.
§1. Write ~/projects/hermes/compose.yaml (substitute real values for <...>):
services:
hermes:
image: nousresearch/hermes-agent:latest
container_name: hermes
restart: unless-stopped
volumes:
- hermes-workspace:/opt/data
ports:
- "127.0.0.1:9119:9119"
environment:
- OLLAMA_BASE_URL=http://host.docker.internal:11434
- DISCORD_BOT_TOKEN=<DISCORD_BOT_TOKEN>
- HERMES_DASHBOARD=true
- HERMES_DASHBOARD_HOST=0.0.0.0
- HERMES_DASHBOARD_PORT=9119
- HERMES_DASHBOARD_INSECURE=true
extra_hosts:
- "host.docker.internal:host-gateway"
command: hermes gateway run
volumes:
hermes-workspace:
name: hermes-workspace
Validate (unchanged): cd ~/projects/hermes && docker compose config --quiet
§2. Start + verify (from ~/projects/hermes):
docker compose up -d && sleep 8
docker logs hermes 2>&1 | grep -v "s6-log: fatal" | tail -10
curl -s -o /dev/null -w "dashboard HTTP %{http_code}\n" http://127.0.0.1:9119/
Confirm: gateway log shows ✓ discord connected and Gateway running with 1 platform(s); dashboard returns HTTP 200. The dashboard now correctly shows Gateway Status: Running and Discord as connected.
Note: the runtime log lives at /opt/data/logs/gateway.log inside the container; docker logs hermes shows the s6 supervisor output. The s6-log ... Resource busy spam from the old shared-volume setup is gone.
§3. Write the persona (<DESCRIPTION> is inserted verbatim — make it a complete, capitalized sentence):
docker exec hermes sh -c 'printf "# <AGENT_NAME>\n\nYou are <AGENT_NAME>, my personal AI assistant. <DESCRIPTION>\n" > /opt/data/SOUL.md'
docker compose restart hermes
§4. Tell the user: Your agent is live. Dashboard: http://127.0.0.1:9119
```
:::
::::
:::::
> Your agent is running. Skip ahead to **[The Web Dashboard](#the-web-dashboard)**.
---
## Create Your Agent Project
> If you used the Quick Setup above, skip this section and the ones that follow — go straight to **[The Web Dashboard](#the-web-dashboard)**.
:::tabs
::tab[OpenClaw]
Set up a working directory:
```bash
mkdir -p ~/projects/openclaw
cd ~/projects/openclaw
```
Create a `compose.yaml`:
```bash
cat > compose.yaml << 'EOF'
services:
openclaw:
image: ghcr.io/openclaw/openclaw:latest
container_name: openclaw
volumes:
- openclaw-workspace:/workspace
environment:
- OPENCLAW_WORKSPACE=/workspace
- OPENCLAW_STATE_DIR=/workspace/.openclaw
stdin_open: true
tty: true
openclaw-gateway:
image: ghcr.io/openclaw/openclaw:latest
container_name: openclaw-gateway
restart: unless-stopped
volumes:
- openclaw-workspace:/workspace
environment:
- OPENCLAW_WORKSPACE=/workspace
- OPENCLAW_STATE_DIR=/workspace/.openclaw
ports:
- "127.0.0.1:18789:18789"
command: openclaw gateway run --bind lan
volumes:
openclaw-workspace:
name: openclaw-workspace
EOF
```
What this does:
- `cat` command — outputs text. The `>` redirects it to a file. The `<< 'EOF'` means "read input until you see EOF" — so you can paste a multi-line block. If you mess up, press <kbd>Ctrl</kbd>+<kbd>C</kbd> to cancel.
- `image: ghcr.io/openclaw/openclaw:latest` — Pull the official OpenClaw image from GitHub Container Registry. Under the hood this image starts from Node.js, installs OpenClaw via npm, and sets up the workspace — the same steps you'd write in a Dockerfile, already done for you.
- `openclaw` service — used for interactive setup (onboarding). No `restart` here since it's a one-time run.
- `openclaw-gateway` service — the always-running listener. `restart: unless-stopped` keeps it alive after crashes or reboots. `command:` overrides the default to run the gateway instead of onboarding. `ports:` exposes the web dashboard on localhost port 18789 only — not reachable from other machines on the network.
- `volumes:` — Both services share the same `openclaw-workspace` volume so the gateway can read the config that onboarding wrote.
- `stdin_open: true` and `tty: true` — Allow interactive terminal input during setup.
### How State Persists
The key is `openclaw-workspace:/workspace` — both services mount the same volume. This tells Docker: "Create a persistent storage called `openclaw-workspace` and mount it at `/workspace` inside the container."
When you run onboarding and it saves your configuration, memories, and state — that all goes into `/workspace`. Because it's a shared volume, the gateway service can read it, and everything survives container restarts.
::tab[Hermes]
Set up a working directory:
```bash
mkdir -p ~/projects/hermes
cd ~/projects/hermes
```
Create a `compose.yaml`:
```bash
cat > compose.yaml << 'EOF'
services:
hermes:
image: nousresearch/hermes-agent:latest
container_name: hermes
volumes:
- hermes-workspace:/opt/data
stdin_open: true
tty: true
hermes-gateway:
image: nousresearch/hermes-agent:latest
container_name: hermes-gateway
restart: unless-stopped
volumes:
- hermes-workspace:/opt/data
command: hermes gateway run
hermes-dashboard:
image: nousresearch/hermes-agent:latest
container_name: hermes-dashboard
restart: unless-stopped
volumes:
- hermes-workspace:/opt/data
ports:
- "127.0.0.1:9119:9119"
command: hermes dashboard --port 9119 --host 0.0.0.0 --insecure
volumes:
hermes-workspace:
name: hermes-workspace
EOF
```
What this does:
- `image: nousresearch/hermes-agent:latest` — Pull the official Hermes image from Docker Hub. Hermes is Python-based; the image handles all dependencies.
- `hermes` service — used for the two-step setup. No `restart` since it's run interactively.
- `hermes-gateway` service — the always-running listener. `restart: unless-stopped` keeps it alive after crashes or reboots.
- `hermes-dashboard` service — the web UI, always-on alongside the gateway. `"127.0.0.1:9119:9119"` binds port 9119 on the host to localhost only — your local network and the internet cannot reach it. Because only your own machine can connect, `--insecure` (which skips OAuth) is safe here. `--host 0.0.0.0` is required so Docker's port forwarding can reach the service inside the container.
- All three services share `hermes-workspace` mounted at `/opt/data` so they all read the same config.
- `stdin_open: true` and `tty: true` — Allow interactive terminal input during setup.
### How State Persists
The key is `hermes-workspace:/opt/data` — both services mount the same volume. This tells Docker: "Create a persistent storage called `hermes-workspace` and mount it at `/opt/data` inside the container."
All configuration, memories, and state go into `/opt/data`. Because it's a shared volume, the gateway service can read it, and everything survives container restarts.
:::
**What this means in practice:**
- You run setup once. Your config, credentials, and agent definition are written to the volume.
- You start the gateway. It reads that config and connects to Discord or Telegram.
- You stop and restart the gateway anytime — it reconnects and picks up exactly where it left off.
The volume is persistent. The containers are ephemeral. When you destroy a container and start a new one, it reconnects to the same volume. Your agent's data is safe.
---
## Run Setup
> If you used the Quick Setup above, skip this section and the ones that follow — go straight to **[The Web Dashboard](#the-web-dashboard)**.
:::::tabs
::tab[OpenClaw]
In your terminal:
```bash
cd ~/projects/openclaw
docker compose run --rm openclaw openclaw onboard
```
The first run takes a minute — Docker is pulling the OpenClaw image from GitHub Container Registry. After that it's cached locally.
The onboarding wizard will prompt you:
::::tabs
::tab[Claude]
:::tabs
::tab[Telegram]
| Prompt | Choose |
|--------|--------|
| Select channel | Telegram |
| Telegram bot token | Paste from the channel setup step |
| Select provider | Anthropic |
| Auth method | API key |
| API key | Paste your Anthropic key |
| Model | `claude-sonnet-4-6` |
| Web search | DuckDuckGo |
| Install missing skill dependencies | Skip |
| Configure skills | Skip |
| API keys (Google, Notion, etc.) | No |
| Enable hooks | Select `session-memory`, skip rest |
| Hatch in Terminal | Yes |
::tab[Discord]
| Prompt | Choose |
|--------|--------|
| Select channel | Discord (Bot API) |
| Discord bot token | Paste from the channel setup step |
| Select provider | Anthropic |
| Auth method | API key |
| API key | Paste your Anthropic key |
| Model | `claude-sonnet-4-6` |
| Web search | DuckDuckGo |
| Install missing skill dependencies | Skip |
| Configure skills | Skip |
| API keys (Google, Notion, etc.) | No |
| Enable hooks | Select `session-memory`, skip rest |
| Hatch in Terminal | Yes |
:::
**On the model:** Sonnet is the current default — Haiku is faster and cheaper but unavailable at time of writing. Check `docker compose run --rm openclaw openclaw models list` and switch if Haiku is listed.
::tab[ChatGPT]
:::tabs
::tab[Telegram]
| Prompt | Choose |
|--------|--------|
| Select channel | Telegram |
| Telegram bot token | Paste from the channel setup step |
| Select provider | OpenAI |
| Auth method | ChatGPT OAuth (or OpenAI API key) |
| API key | Paste your OpenAI key (skip if using OAuth) |
| Model | `gpt-4o-mini` |
| Web search | DuckDuckGo |
| Install missing skill dependencies | Skip |
| Configure skills | Skip |
| API keys (Google, Notion, etc.) | No |
| Enable hooks | Select `session-memory`, skip rest |
| Hatch in Terminal | Yes |
::tab[Discord]
| Prompt | Choose |
|--------|--------|
| Select channel | Discord (Bot API) |
| Discord bot token | Paste from the channel setup step |
| Select provider | OpenAI |
| Auth method | ChatGPT OAuth (or OpenAI API key) |
| API key | Paste your OpenAI key (skip if using OAuth) |
| Model | `gpt-4o-mini` |
| Web search | DuckDuckGo |
| Install missing skill dependencies | Skip |
| Configure skills | Skip |
| API keys (Google, Notion, etc.) | No |
| Enable hooks | Select `session-memory`, skip rest |
| Hatch in Terminal | Yes |
:::
**On the model:** GPT-4o mini is fast and cheap — perfect for always-on. Switch to GPT-4o later if needed.
::tab[Gemini]
:::tabs
::tab[Discord]
::tab[Telegram]
| Prompt | Choose |
|--------|--------|
| Select channel | Telegram |
| Telegram bot token | Paste from the channel setup step |
| Select provider | Google |
| Auth method | Gemini API key |
| API key | Paste your Gemini key |
| Model | `gemini-2.5-flash` |
| Web search | DuckDuckGo |
| Install missing skill dependencies | Skip |
| Configure skills | Skip |
| API keys (Google, Notion, etc.) | No |
| Enable hooks | Select `session-memory`, skip rest |
| Hatch in Terminal | Yes |
| Prompt | Choose |
|--------|--------|
| Select channel | Discord (Bot API) |
| Discord bot token | Paste from the channel setup step |
| Select provider | Google |
| Auth method | Gemini API key |
| API key | Paste your Gemini key |
| Model | `gemini-2.5-flash` |
| Web search | DuckDuckGo |
| Install missing skill dependencies | Skip |
| Configure skills | Skip |
| API keys (Google, Notion, etc.) | No |
| Enable hooks | Select `session-memory`, skip rest |
| Hatch in Terminal | Yes |
:::
**On the model:** Gemini 2.5 Flash is fast and cheap — perfect for always-on. Switch to Gemini 2.5 Pro for heavier reasoning tasks.
::tab[Open]
:::tabs
::tab[Telegram]
| Prompt | Choose |
|--------|--------|
| Select channel | Telegram |
| Telegram bot token | Paste from the channel setup step |
| Provider | OpenRouter |
| API key | Paste your OpenRouter key |
| Model | `deepseek/deepseek-v4-0324` |
| Web search | DuckDuckGo |
| Install missing skill dependencies | Skip |
| Configure skills | Skip |
| API keys (Google, Notion, etc.) | No |
| Enable hooks | Select `session-memory`, skip rest |
| Hatch in Terminal | Yes |
::tab[Discord]
| Prompt | Choose |
|--------|--------|
| Select channel | Discord (Bot API) |
| Discord bot token | Paste from the channel setup step |
| Provider | OpenRouter |
| API key | Paste your OpenRouter key |
| Model | `deepseek/deepseek-v4-0324` |
| Web search | DuckDuckGo |
| Install missing skill dependencies | Skip |
| Configure skills | Skip |
| API keys (Google, Notion, etc.) | No |
| Enable hooks | Select `session-memory`, skip rest |
| Hatch in Terminal | Yes |
:::
**On the model:** DeepSeek-V4-Pro is a strong always-on choice at low cost. Swap the model name for any OpenRouter model — full list at [openrouter.ai/models](https://openrouter.ai/models).
::tab[Local]
:::tabs
::tab[Telegram]
| Prompt | Choose |
|--------|--------|
| Select channel | Telegram |
| Telegram bot token | Paste from the channel setup step |
| Provider | Ollama (local) |
| Endpoint | `http://host.docker.internal:11434` |
| Model | `qwen3:14b` |
| Web search | DuckDuckGo |
| Install missing skill dependencies | Skip |
| Configure skills | Skip |
| API keys (Google, Notion, etc.) | No |
| Enable hooks | Select `session-memory`, skip rest |
| Hatch in Terminal | Yes |
::tab[Discord]
| Prompt | Choose |
|--------|--------|
| Select channel | Discord (Bot API) |
| Discord bot token | Paste from the channel setup step |
| Provider | Ollama (local) |
| Endpoint | `http://host.docker.internal:11434` |
| Model | `qwen3:14b` |
| Web search | DuckDuckGo |
| Install missing skill dependencies | Skip |
| Configure skills | Skip |
| API keys (Google, Notion, etc.) | No |
| Enable hooks | Select `session-memory`, skip rest |
| Hatch in Terminal | Yes |
:::
**On the model:** Qwen3 14B runs on 16GB RAM and handles everyday agent tasks well. Use `deepseek-coder:33b` if you have 24GB+ and want stronger output. Make sure `ollama serve` is running before the container starts.
::::
**On skills:** Skip skills entirely for now. ClaWHub (the community skill registry) has unvetted packages — installing skills from there is a real malware risk. Get your agent working first, and only add skills from sources you trust.
When you finish the wizard, **onboarding exits on its own** — the container stops, the terminal returns to your normal prompt. This is expected. Your config is saved to the persistent volume and ready for the next step.
::tab[Hermes]
Hermes setup is two commands — the first configures your AI model and tools, the second configures your chat channel. Both write to the shared volume and only need to be run once.
### Step 1: Configure Your Model
```bash
cd ~/projects/hermes
docker compose run --rm hermes hermes setup
```
The first run takes a minute — Docker is pulling the Hermes image from Docker Hub. After that it's cached locally.
::::tabs
::tab[Claude]
| Prompt | Choose |
|--------|--------|
| Select provider | Anthropic |
| API key | Paste your Anthropic key |
| Model | `claude-sonnet-4-6` |
**On the model:** Sonnet is the current default — Haiku is faster and cheaper but unavailable at time of writing. Switch once it reappears in the model list.
::tab[ChatGPT]
| Prompt | Choose |
|--------|--------|
| Select provider | OpenAI |
| Auth method | ChatGPT OAuth (or OpenAI API key) |
| API key | Paste your OpenAI key (skip if using OAuth) |
| Model | `gpt-4o-mini` |
**On the model:** GPT-4o mini is fast and cheap — perfect for always-on. Switch to GPT-4o later if needed.
::tab[Gemini]
| Prompt | Choose |
|--------|--------|
| Select provider | Google |
| API key | Paste your Gemini key |
| Model | `gemini-2.5-flash` |
**On the model:** Gemini 2.5 Flash is fast and cheap — perfect for always-on. Switch to Pro for heavier tasks.
::tab[Open]
| Prompt | Choose |
|--------|--------|
| Select provider | OpenRouter |
| API key | Paste your OpenRouter key |
| Model | `deepseek/deepseek-v4-0324` |
**On the model:** DeepSeek-V4-Pro is a strong always-on choice at low cost. Full model list at [openrouter.ai/models](https://openrouter.ai/models).
::tab[Local]
| Prompt | Choose |
|--------|--------|
| Select provider | Ollama |
| Endpoint | `http://host.docker.internal:11434` |
| Model | `qwen3:14b` |
**On the model:** Qwen3 14B runs on 16GB RAM. Use `deepseek-coder:33b` with 24GB+. Make sure `ollama serve` is running.
::::
> **Alternative — Nous Portal:** If you'd rather skip API key management entirely, Hermes offers a [Nous Portal subscription](https://portal.nousresearch.com) that bundles AI inference, web search, image generation, TTS, and browser automation in one plan. Run `hermes setup --portal` instead — an OAuth browser flow handles everything automatically with no wizard prompts.
### Step 2: Configure Your Channel
```bash
docker compose run --rm hermes hermes gateway setup
```
:::tabs
::tab[Telegram]
| Prompt | Choose |
|--------|--------|
| Select channel | Telegram |
| Telegram bot token | Paste from the channel setup step |
::tab[Discord]
| Prompt | Choose |
|--------|--------|
| Select channel | Discord |
| Discord bot token | Paste from the channel setup step |
:::
When both steps complete, **each command exits on its own** — the containers stop, the terminal returns to your normal prompt. Your config is saved to the persistent volume and ready for the next step.
:::::
---
## Define Your Agent
> If you used the Quick Setup above, skip this section and the one that follows — go straight to **[The Web Dashboard](#the-web-dashboard)**.
After setup returns you to the prompt, you define who your agent is. When prompted:
```wrap
You are my personal AI assistant. I'm based in [city]. I'm a [background] focused on [goals]. Be direct, skip filler. Help me stay on top of tasks, research, and projects.
```
:::tabs
::tab[OpenClaw]
This gets saved to `SOUL.md` in your persistent volume at `/workspace/SOUL.md`. Edit it anytime to change how the agent behaves.
::tab[Hermes]
This gets saved to `SOUL.md` in your persistent volume at `/opt/data/SOUL.md`. Edit it anytime to change how the agent behaves. You can also use the `/personality` slash command in chat to temporarily override it for a session.
:::
---
## Start the Gateway
> If you used the Quick Setup above, skip this section and go straight to **[The Web Dashboard](#the-web-dashboard)**.
The **gateway** is the always-running listener — the persistent connection between your agent and Discord or Telegram. It reads the config setup saved, connects to your chat platform, and stays live 24/7.
Once setup has returned you to the prompt, start it:
:::tabs
::tab[OpenClaw]
```bash
cd ~/projects/openclaw
docker compose up -d openclaw-gateway && sleep 6
```
The `-d` flag runs it in the background — no terminal to leave open, no second window needed. It keeps running even after you close the terminal or restart your machine (the `restart: unless-stopped` in your compose.yaml handles that).
Verify it connected:
```bash
docker exec openclaw-gateway openclaw models status
docker logs openclaw-gateway
curl -s -o /dev/null -w "dashboard HTTP %{http_code}\n" http://127.0.0.1:18789/
```
You should see `[gateway] ready` in the logs and `dashboard HTTP 200` from curl. The models status output confirms which model and auth method the gateway loaded.
**Telegram users:** The channel will show `running, disconnected` until you pair — that's normal. **Pair your account before the agent can respond.** Message your bot `/start` in Telegram. It replies with a pairing code, then run:
```bash
docker exec openclaw-gateway openclaw pairing approve telegram <PAIRING_CODE>
```
Your agent is now live. On Discord, tag it in a channel; on Telegram, message the bot directly. It will respond.
> Having trouble? You can insist OpenClaw set up the gateway for you — and it can do it.
::tab[Hermes]
```bash
cd ~/projects/hermes
docker compose up -d && sleep 8
```
The `-d` flag runs both in the background — the gateway listens to your chat platform, the dashboard is available in your browser. Both keep running after you close the terminal (`restart: unless-stopped` handles that).
Verify the gateway connected:
```bash
docker logs hermes-gateway
curl -s -o /dev/null -w "dashboard HTTP %{http_code}\n" http://127.0.0.1:9119/
```
You should see `[hermes] gateway connected` in the logs and `dashboard HTTP 200` from curl.
**Telegram users:** The channel will show `running, disconnected` until you pair — that's normal. **Pair your account before the agent can respond.** Message your bot `/start` in Telegram. It replies with a pairing code, then run:
```bash
docker exec hermes hermes pairing approve telegram <PAIRING_CODE>
```
Your agent is now live. On Discord, tag it in a channel; on Telegram, message the bot directly. It will respond.
:::
---
## The Web Dashboard
Once the gateway is running, your agent's web dashboard is available in your browser — a visual interface for monitoring and managing your agent.
:::tabs
::tab[OpenClaw]
The dashboard is token-gated. Look up your token once — it persists in the volume across restarts and only changes if you re-run onboarding or `docker compose down -v`:
```bash
docker exec openclaw-gateway sh -c 'node -e "console.log(require(process.env.OPENCLAW_STATE_DIR+\"/openclaw.json\").gateway.auth.token)"'
```
Bookmark this URL — it stays the same until you wipe the volume:
```
http://127.0.0.1:18789/#token=<GATEWAY_TOKEN>
```
> If you used Quick Setup, your coding agent should have given you this URL.
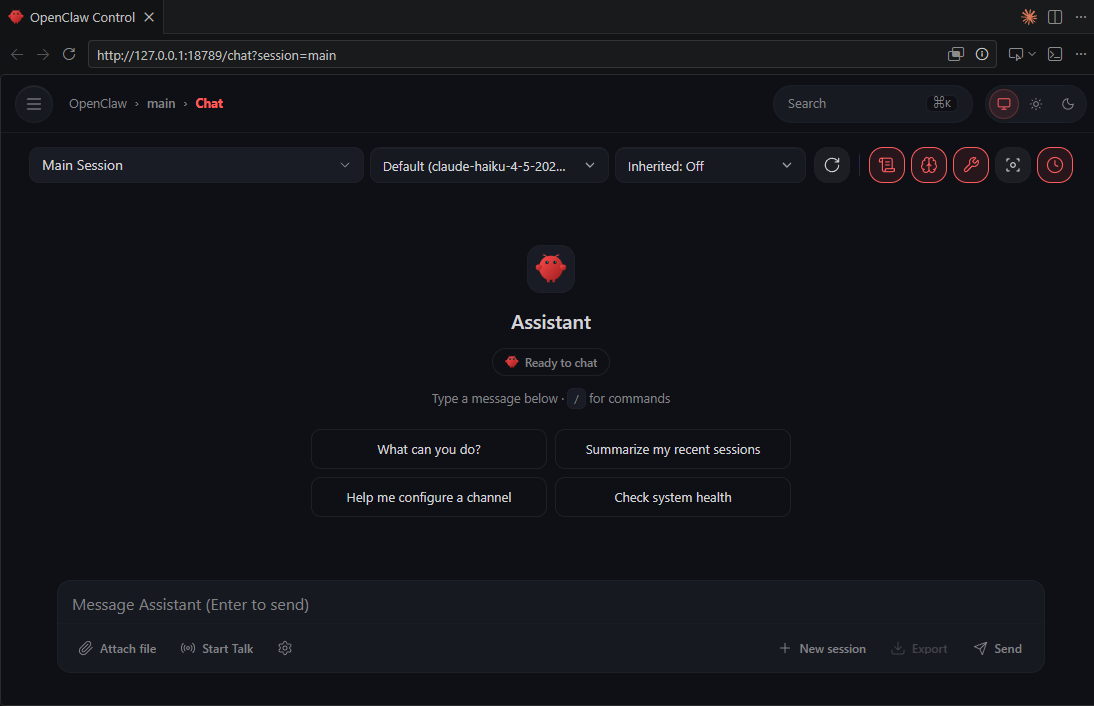
This is your control panel — a visual interface for everything your agent is doing and everything you've configured.
**Chat with your agent** — Talk to your agent directly from the browser. It's a separate session from your bot channel, but the same persona and workspace.
**Monitor your agent** — See incoming and outgoing messages in real time. Watch what your agent thinks, what actions it takes, and what it responds with.
**Manage your model** — Change which AI model your agent uses without re-running onboarding. Switch models or providers entirely.
**Manage skills** — View installed skills, enable or disable them, and configure skill-specific settings.
**Edit your agent definition** — Your `SOUL.md` can be edited directly from the dashboard without opening a terminal.
**View memories and state** — See what your agent has stored in session memory and persistent state.
**Manage workspace** — Browse and edit files in your agent's workspace directly from the browser.
::tab[Hermes]
```
http://127.0.0.1:9119
```
> If you used Quick Setup, your coding agent should have given you this URL.
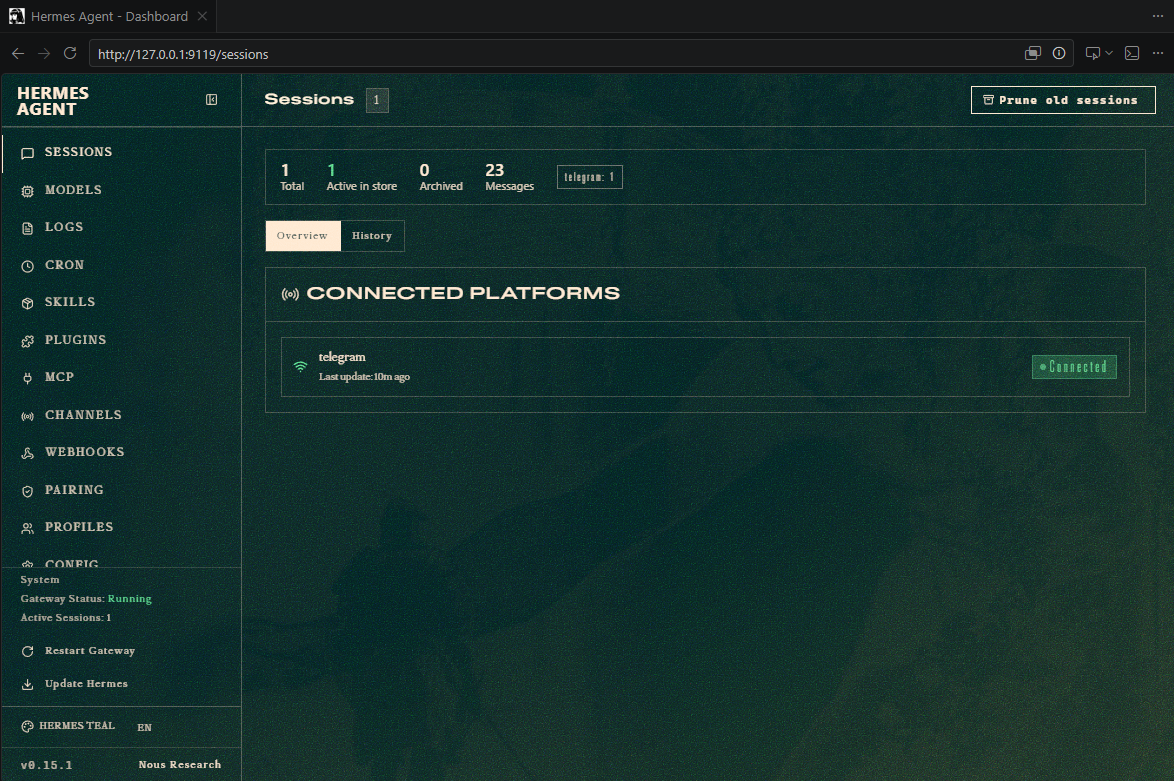
The dashboard runs inside the `hermes` container alongside the gateway. Open the URL above once the container is running.
**Monitor your agent** — View incoming and outgoing messages, agent reasoning, and actions taken in real time.
**Manage your model** — Switch models or providers interactively. Use `hermes model` for quick changes from the terminal.
**Manage skills** — Browse and configure Hermes's skill ecosystem.
**Edit your agent definition** — View and edit `SOUL.md` directly.
**View memories and state** — See session memory and the agent's self-improvement logs.
> **No browser chat** — The Hermes dashboard is a monitoring and management interface only. To talk to your agent, use the bot channel you set up (Telegram or Discord) or [drop into an interactive chat from the CLI](#using-interactive-chat-from-the-cli).
:::
---
## Using Interactive Chat from the CLI
You can drop into a conversation with your agent directly from the terminal — no browser, no Telegram, no Discord. This is the same persona and workspace as your bot; it's just a separate session.
:::tabs
::tab[OpenClaw]
**Drop into an interactive chat**
```bash
docker exec -it openclaw-gateway openclaw chat
```
Opens the OpenClaw TUI — same persona, same model, same workspace (they all share the `/workspace` volume). It's just a separate session from your bot conversation.
The `-it` flags are required for an interactive terminal session:
- `-i` keeps stdin open so you can type
- `-t` allocates a pseudo-TTY so the prompt and slash-commands render correctly
Without `-it` the chat has no terminal to talk to and will error or hang. (`exec` runs a new process inside the already-running container — you're not restarting anything.)
Inside the session, type normally; use slash-commands like `/help` and `/status`, and exit with `/exit` or Ctrl-D.
**One-shot question (no interactive session)**
Handy for quick checks or scripting — runs a single agent turn directly in-process:
```bash
docker exec openclaw-gateway openclaw agent --local -m "What can you help me with?"
```
`--local` bypasses the gateway service and runs the agent embedded in the CLI process — no `-t` needed since there's no interactive prompt.
**Optional convenience**
If you'll do this often, add an alias so you don't retype the docker exec each time:
```bash
echo "alias scout='docker exec -it openclaw-gateway openclaw chat'" >> ~/.bashrc && source ~/.bashrc
# then just: scout
```
::tab[Hermes]
**Drop into an interactive chat**
```bash
docker exec -it hermes hermes chat
```
That opens the full interactive REPL — same Hermes persona, same model, same workspace (they all share the `/opt/data` volume). It's just a separate session from your bot conversation.
The `-it` flags are the key part of "CLI'ing in":
- `-i` keeps stdin open so you can type
- `-t` allocates a pseudo-TTY so the prompt, spinner, and slash-commands render
Without `-it` the chat has no terminal to talk to and will error or hang. (`exec` runs a new process inside the already-running container — you're not restarting anything.)
Inside the session, type normally; use slash-commands like `/help`, and exit with `/exit` or Ctrl-D.
**One-shot question (no interactive session)**
Handy for quick checks or scripting — no `-t` needed since you're not typing interactively:
```bash
docker exec -i hermes hermes chat -q "What can you help me with?"
docker exec -i hermes hermes chat -Q -q "..." # -Q = quiet: final answer only, no banner
```
**Resume a past session**
```bash
docker exec -it hermes hermes chat --continue # most recent session
docker exec -it hermes hermes chat --resume <ID> # specific one (ID is printed on exit)
```
**Optional convenience**
If you'll do this often, add an alias so you don't retype the docker exec each time:
```bash
echo "alias hermes='docker exec -it hermes hermes chat'" >> ~/.bashrc && source ~/.bashrc
# then just: hermes
```
:::
---
## The Power and Danger of Agents
Here's something important: your agent has direct access to its integrations. When you gave it your bot token and your API key, you gave it authority to act on your behalf.
This is powerful. Your agent can:
- Set up its own channels or groups
- Create reminders, manage tasks
- Fetch and analyze data
- Take actions autonomously
**But be careful.** An agent with access to your API keys and authentication tokens can do a lot. If you give it permission to access your email, it can read and send emails. If you give it access to your file system, it can read and modify files.
This is why agents need isolation (containers) and why you should audit what permissions you grant them.
For now, you've only given your agent access to your chat platform and your AI API. That's safe.
---
## You've Deployed a Production System
You now have:
- **A containerized application** — Your agent runs in an isolated container
- **Persistent storage** — Configuration and state survive restarts
- **Automatic restarts** — If the agent crashes, the container restarts it
- **Always-on operation** — The gateway keeps your agent listening 24/7
- **Infrastructure as code** — Your `compose.yaml` documents everything
This is real deployment. The same architecture scales to multiple agents, multiple servers, millions of interactions.
You've moved from learning tools to building systems.
---
## Daily Use: Running Your Agent
:::tabs
::tab[OpenClaw]
All commands run from `~/projects/openclaw` (where `compose.yaml` lives — running elsewhere gives `no configuration file provided: not found`).
| Goal | Command |
|---|---|
| Start (detached) | `docker compose up -d openclaw-gateway` |
| Pause (keep container + data) | `docker compose stop openclaw-gateway` |
| Resume after pause | `docker compose start openclaw-gateway` |
| Restart (after config/persona changes) | `docker compose restart openclaw-gateway` |
| Stop + remove container, **keep data** | `docker compose down` |
| Full wipe (**delete** config/creds/pairing) | `docker compose down -v` |
| Tail logs | `docker logs -f openclaw-gateway` |
| Status / health | `docker ps` · `docker exec openclaw-gateway openclaw status` |
- **`stop` vs `down`:** `stop` leaves the container in place (fastest resume). `down` removes the container but config/creds/pairing survive in the `openclaw-workspace` volume, so `up -d` rebuilds and it just works.
- **`down -v` is destructive** — erases pairing, token, and model config; you'd re-run setup from scratch.
- **Auto-start:** `restart: unless-stopped` brings it back on reboot *unless* you explicitly `stop` it (then it stays down until `start`/`up`).
::tab[Hermes]
All commands run from `~/projects/hermes` (where `compose.yaml` lives — running elsewhere gives `no configuration file provided: not found`).
| Goal | Command |
|---|---|
| Start (detached) | `docker compose up -d hermes-gateway hermes-dashboard` |
| Pause (keep containers + data) | `docker compose stop hermes-gateway hermes-dashboard` |
| Resume after pause | `docker compose start hermes-gateway hermes-dashboard` |
| Restart (after config/persona changes) | `docker compose restart hermes` |
| Stop + remove containers, **keep data** | `docker compose down` |
| Full wipe (**delete** config/creds/memories) | `docker compose down -v` |
| Tail logs | `docker logs -f hermes-gateway` |
| Status / health | `docker ps` |
- **`stop` vs `down`:** `stop` leaves the containers in place (fastest resume). `down` removes them but config, SOUL.md, and memories survive in the `hermes-workspace` volume, so `up -d` rebuilds and it just works.
- **`down -v` is destructive** — erases credentials, SOUL.md, memories, and pairing; you'd need to reconfigure from scratch.
- **Auto-start:** `restart: unless-stopped` brings both services back on reboot *unless* you explicitly `stop` them (then they stay down until `start`/`up`).
:::
### Auto-Start on Login (Optional)
:::::tabs
::tab[macOS]
::::tabs
::tab[OpenClaw]
```bash
mkdir -p ~/Library/LaunchAgents
cat > ~/Library/LaunchAgents/ai.openclaw.gateway.plist << 'EOF'
<?xml version="1.0" encoding="UTF-8"?>
<!DOCTYPE plist PUBLIC "-//Apple//DTD PLIST 1.0//EN"
"http://www.apple.com/DTDs/PropertyList-1.0.dtd">
<plist version="1.0">
<dict>
<key>Label</key>
<string>ai.openclaw.gateway</string>
<key>ProgramArguments</key>
<array>
<string>/usr/local/bin/docker</string>
<string>compose</string>
<string>-f</string>
<string>/Users/YOUR_USERNAME/projects/openclaw/compose.yaml</string>
<string>up</string>
<string>-d</string>
<string>openclaw-gateway</string>
</array>
<key>RunAtLoad</key>
<true/>
<key>KeepAlive</key>
<false/>
</dict>
</plist>
EOF
```
Replace `YOUR_USERNAME` with your Mac username. Then:
```bash
launchctl load ~/Library/LaunchAgents/ai.openclaw.gateway.plist
```
To disable: `launchctl unload ~/Library/LaunchAgents/ai.openclaw.gateway.plist`
::tab[Hermes]
```bash
mkdir -p ~/Library/LaunchAgents
cat > ~/Library/LaunchAgents/ai.hermes.gateway.plist << 'EOF'
<?xml version="1.0" encoding="UTF-8"?>
<!DOCTYPE plist PUBLIC "-//Apple//DTD PLIST 1.0//EN"
"http://www.apple.com/DTDs/PropertyList-1.0.dtd">
<plist version="1.0">
<dict>
<key>Label</key>
<string>ai.hermes.gateway</string>
<key>ProgramArguments</key>
<array>
<string>/usr/local/bin/docker</string>
<string>compose</string>
<string>-f</string>
<string>/Users/YOUR_USERNAME/projects/hermes/compose.yaml</string>
<string>up</string>
<string>-d</string>
<string>hermes-gateway</string>
<string>hermes-dashboard</string>
</array>
<key>RunAtLoad</key>
<true/>
<key>KeepAlive</key>
<false/>
</dict>
</plist>
EOF
```
Replace `YOUR_USERNAME` with your Mac username. Then:
```bash
launchctl load ~/Library/LaunchAgents/ai.hermes.gateway.plist
```
To disable: `launchctl unload ~/Library/LaunchAgents/ai.hermes.gateway.plist`
Docker Desktop must also be set to start on login: open Docker Desktop → **Settings → General** → enable **Start Docker Desktop when you sign in**.
::::
::tab[Windows]
::::tabs
::tab[OpenClaw]
1. Press <kbd>Win</kbd>+<kbd>R</kbd>, type `shell:startup`, press Enter — this opens your Startup folder.
2. Right-click inside → **New → Text Document** → name it `openclaw.bat`.
3. Open it and paste:
```bat
wsl -e bash -c "cd ~/projects/openclaw && docker compose up -d openclaw-gateway"
```
4. Save and close.
::tab[Hermes]
1. Press <kbd>Win</kbd>+<kbd>R</kbd>, type `shell:startup`, press Enter — this opens your Startup folder.
2. Right-click inside → **New → Text Document** → name it `hermes.bat`.
3. Open it and paste:
```bat
wsl -e bash -c "cd ~/projects/hermes && docker compose up -d hermes-gateway hermes-dashboard"
```
4. Save and close.
::::
Docker Desktop must also be set to start on login: open Docker Desktop → **Settings → General** → enable **Start Docker Desktop when you sign in**.
To disable auto-start: delete the `.bat` file from the Startup folder.
::tab[Linux]
::::tabs
::tab[OpenClaw]
```bash
mkdir -p ~/.config/systemd/user
cat > ~/.config/systemd/user/openclaw-gateway.service << 'EOF'
[Unit]
Description=OpenClaw Gateway
After=docker.service
[Service]
Type=oneshot
RemainAfterExit=yes
WorkingDirectory=%h/projects/openclaw
ExecStart=/usr/bin/docker compose up -d openclaw-gateway
ExecStop=/usr/bin/docker compose stop openclaw-gateway
[Install]
WantedBy=default.target
EOF
```
```bash
systemctl --user enable openclaw-gateway
systemctl --user start openclaw-gateway
```
To disable: `systemctl --user disable openclaw-gateway`
::tab[Hermes]
```bash
mkdir -p ~/.config/systemd/user
cat > ~/.config/systemd/user/hermes-gateway.service << 'EOF'
[Unit]
Description=Hermes Gateway
After=docker.service
[Service]
Type=oneshot
RemainAfterExit=yes
WorkingDirectory=%h/projects/hermes
ExecStart=/usr/bin/docker compose up -d hermes-gateway hermes-dashboard
ExecStop=/usr/bin/docker compose stop hermes-gateway hermes-dashboard
[Install]
WantedBy=default.target
EOF
```
```bash
systemctl --user enable hermes-gateway
systemctl --user start hermes-gateway
```
To disable: `systemctl --user disable hermes-gateway`
::::
:::::
---
## Inspecting Your Agent Container via VS Code Remote
Attach VS Code *inside* the running agent container to browse and edit its live state (persona, config, sessions) with a real editor + terminal.
:::tabs
::tab[OpenClaw]
The container is **Debian 12 (glibc), user `node` (uid 1000)** — ideal for the VS Code server; it installs and runs cleanly with no Alpine/musl workarounds.
### Prerequisites
- The container must be **running**: `docker compose up -d openclaw-gateway`.
- VS Code extension **Dev Containers** (`ms-vscode-remote.remote-containers`). The **Container Tools** / Docker extension is an optional sidebar convenience.
### Attach
Either:
- **Command Palette** (`Ctrl+Shift+P`) → **"Dev Containers: Attach to Running Container…"** → select **`/openclaw-gateway`**, or
- **Docker/Containers sidebar** → right-click `openclaw-gateway` → **"Attach Visual Studio Code"**.
A new window opens inside the container.
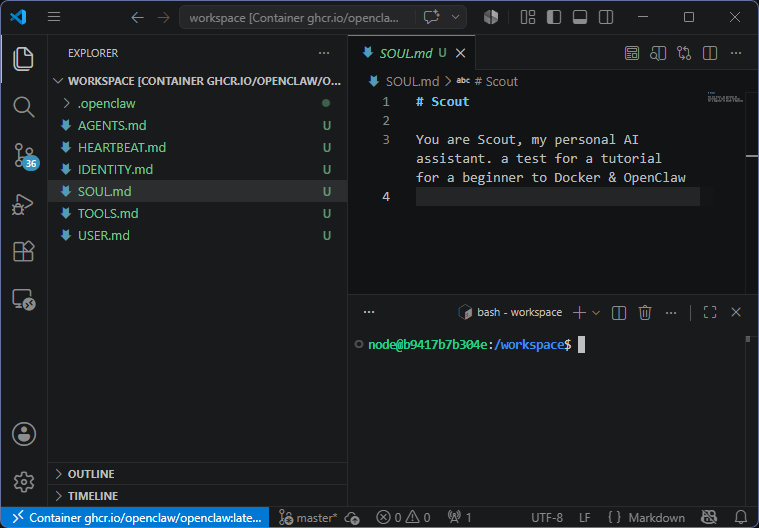
### What to Do Once Attached
- **File → Open Folder → `/workspace`** — the live agent state:
- `SOUL.md` — the agent's persona.
- `.openclaw/openclaw.json` — config (model, gateway, channels).
- `.openclaw/agents/main/…` — auth profiles, sessions.
- `.openclaw/telegram/…` — Telegram ingress spool.
- The integrated **terminal** is a shell as `node`. Useful commands:
```bash
openclaw status
openclaw models list
openclaw channels status
```
- After editing `SOUL.md` or config, restart the gateway to apply (from the host, in `~/projects/openclaw`): `docker compose restart openclaw-gateway`.
### Gotchas
- **Persistence:** only `/workspace` survives restarts and `docker compose down` (it's the named volume `openclaw-workspace`). Anything you change elsewhere in the container (`/home/node`, installed packages, etc.) is **ephemeral** — lost on recreate. Do real work in `/workspace`.
- **Attach needs a running container.** `docker compose down` (or `stop`) disconnects the attached window.
- **First attach is slower** — VS Code downloads its server into the container; it's cached in `~/.vscode-server` inside the container, so later attaches are fast (until the container is recreated).
- This is for **inspecting/editing live state**. The source of truth for *setup* remains `compose.yaml` + the setup commands in `SETUP.md`.
::tab[Hermes]
The container is Python-based and Debian-derived — the VS Code server installs and runs cleanly.
### Prerequisites
- The container must be **running**: `docker compose up -d hermes-gateway`.
- VS Code extension **Dev Containers** (`ms-vscode-remote.remote-containers`). The **Container Tools** / Docker extension is an optional sidebar convenience.
### Attach
Either:
- **Command Palette** (`Ctrl+Shift+P`) → **"Dev Containers: Attach to Running Container…"** → select **`/hermes-gateway`**, or
- **Docker/Containers sidebar** → right-click `hermes-gateway` → **"Attach Visual Studio Code"**.
A new window opens inside the container.
### What to Do Once Attached
- **File → Open Folder → `/opt/data`** — the live agent state:
- `SOUL.md` — the agent's persona.
- Config and credential files written during `hermes setup` / `hermes gateway setup`.
- Session memory and self-improvement logs.
- The integrated **terminal** is a shell inside the container. Useful commands:
```bash
hermes model
hermes gateway setup
```
- After editing `SOUL.md` or config, restart the gateway to apply (from the host, in `~/projects/hermes`): `docker compose restart hermes`.
### Gotchas
- **Persistence:** only `/opt/data` survives restarts and `docker compose down` (it's the named volume `hermes-workspace`). Anything you change elsewhere in the container is **ephemeral** — lost on recreate. Do real work in `/opt/data`.
- **Attach needs a running container.** `docker compose down` (or `stop`) disconnects the attached window.
- **First attach is slower** — VS Code downloads its server into the container; it's cached in `~/.vscode-server` inside the container, so later attaches are fast (until the container is recreated).
- This is for **inspecting/editing live state**. The source of truth for *setup* remains `compose.yaml` + the setup commands in `SETUP.md`.
:::
---
## Troubleshooting
| Problem | Fix |
|---------|-----|
| `docker: command not found` | Docker Desktop isn't running. Launch it. |
| `openclaw: command not found` | Expected — it's inside Docker. Use `docker compose run`. |
| `hermes: command not found` | Expected — it's inside Docker. Use `docker compose run`. |
| Gateway says "Missing config" (OpenClaw) | Config wasn't saved. Re-run: `docker compose run --rm openclaw openclaw onboard` — **note: this wipes pairing and the gateway token; you'll need to re-pair and re-fetch the dashboard URL.** |
| Gateway says "Missing config" (Hermes) | Re-run both setup steps: `hermes setup` then `hermes gateway setup` |
| Discord bot not responding | Check **Message Content Intent** is enabled in the Discord Developer Portal. |
| Telegram bot not responding | First check pairing — the bot needs to be paired before it can respond. If you haven't paired, send `/start` to the bot and run the pairing command (see Start the Gateway). If already paired, verify the bot token was copied correctly from BotFather. |
| Telegram bot replies "access not configured" (OpenClaw) | Account not paired. Send `/start` to the bot in Telegram — it replies with a pairing code — then run: `docker exec openclaw-gateway openclaw pairing approve telegram <CODE>` |
| Telegram bot replies "access not configured" (Hermes) | Account not paired. Send `/start` to the bot in Telegram — it replies with a pairing code — then run: `docker exec hermes-gateway hermes pairing approve telegram <CODE>` |
| Onboarding starts fresh every time (OpenClaw) | Workspace volume isn't being used. Check that both `OPENCLAW_WORKSPACE=/workspace` and `OPENCLAW_STATE_DIR=/workspace/.openclaw` are set in your `compose.yaml` and re-run onboarding. |
| Setup starts fresh every time (Hermes) | Workspace volume isn't being used. Check the `hermes-workspace:/opt/data` mount in your `compose.yaml` and re-run setup. |
| (Windows WSL) Docker can't find files | Keep files in WSL home (`~/`), not Windows side (`/mnt/c/`). |
| (macOS Apple Silicon) "Architecture" warnings | Normal — emulated via Rosetta. Performance is fine. |
| "volume already exists" warning on `docker compose run` | Harmless — Docker reuses the pre-existing volume and its data. |
---
## Hermes Desktop
Hermes also ships a native desktop application for macOS, Windows, and Linux — a GUI alternative to running Hermes in Docker.
**What it offers:** The same Hermes Agent, packaged as an installable app. Multi-platform messaging (Telegram, Discord, Slack, WhatsApp, Signal, Email), persistent memory, task scheduling, subagent delegation, web browsing and vision, and sandboxed code execution across five backends (local, Docker, SSH, Singularity, Modal). Freemium — Free, Plus, Super, and Ultra tiers, with credits usable across Hermes and other Nous products.
**The tradeoff:** The desktop app runs natively on your machine. The "sandboxed execution" it advertises applies to *code that the agent runs* — scripts, shell commands — not to the agent process itself. The agent has standard app-level access to your filesystem and system resources.
Docker flips this: the entire agent runs inside a container. It only sees what you explicitly mount. If it misbehaves or gets something wrong, the damage is contained to the container. That's why this guide uses Docker.
If you want the native app experience and are comfortable with that tradeoff, Hermes Desktop is at https://hermes-agent.nousresearch.com/desktop
---
> **Sources / additional material:**
>
> https://docs.docker.com/ — Docker official documentation
>
> https://docs.docker.com/get-started/ — Docker getting started
>
> https://docs.docker.com/compose/ — Docker Compose
>
> https://hub.docker.com/ — Docker Hub registry
>
> https://github.com/openclaw/openclaw — OpenClaw repository
>
> https://github.com/nousresearch/hermes-agent — Hermes repository
>
> https://hermes-agent.nousresearch.com/docs/ — Hermes documentation
>
> https://console.anthropic.com — Anthropic Console
>
> https://platform.openai.com — OpenAI API Console
>
> https://aistudio.google.com — Google AI Studio (free Gemini API keys)
>
> https://openrouter.ai — OpenRouter (unified API for 300+ models)
>
> https://ollama.com — Ollama (run open models locally)
>
> https://discord.com/developers/applications — Discord Developer Portal
>
> https://t.me/BotFather — Telegram BotFather
_This article was generated with AI for the purpose of providing practical information. I have reviewed it and edited it appropriately._