Using VS Code with WSL
Series: Foundations of Digital Agency — Part 4 ← Part 3: Installing Terminal & WSL (Windows Subsystem for Linux) → Part 5: Using the Terminal in VS Code
> **Note: This guide is for Windows only.** If you're on macOS or Linux, you are already living in Unix in VS Code, so you can skip this tutorial and move on to the next one in the series. So, you're on Windows. You've installed VS Code, WSL and Windows Terminal and Linux-native GUI apps per the previous entries in the series -- but here's the problem: your editor VS Code is a Windows application. As discussed in the last entry in the series, the world of modern web development assumes a Unix-based environment. You have WSL (Linux) -- so you're close! -- but if you don't configure VS Code properly, you'll be: - Editing files in Windows while tools run in Linux (file sync issues) - Running commands in the wrong environment - Dealing with path mismatches and permission problems - Losing the seamless development experience you're after You don't need to install VS Code again in Linux like the other GUI apps. The solution is the **WSL extension**, an extension that connects VS Code directly to your WSL environment. This guide helps you set it up. ## What's the WSL extension? The WSL extension is a Microsoft extension that lets VS Code run **inside your WSL environment** instead of Windows. Here's what that unlocks: - VS Code connects to WSL and runs there - You edit files in your Linux home directory (`~/projects/...`) - All commands run in the same Linux environment - Everything is unified and seamless It's the missing link between your Windows editor and Linux development environment. ## Why This Matters Here's the key insight: you want to **stay on one side of the fence**. Don't straddle Windows and Linux simultaneously while developing. It's really for the best! And VS Code makes it easy. When you configure VS Code to work with WSL, several things happen: **A Common Base Experience:** Your terminal automatically opens bash, not PowerShell. This means instructions in future tutorials work identically whether you're on Windows or macOS. No need for special "Windows version" steps—you're developing in a Unix environment on both platforms. **Better Performance:** Accessing files from your WSL home directory is faster than accessing Windows files through `/mnt/c/`. Keeping everything on the Linux side means no cross-filesystem overhead. **A Single Source of Truth:** All your projects live in one place (WSL), one filesystem, one set of permissions. No confusion about whether you edited a file from Windows or WSL, no permission conflicts, no npm package installation weirdness. **The Foundation for What's Next:** Later in this series, you'll use Docker to run projects in isolated containers. Docker extends this principle—your code runs in the same type of environment locally as it does in production. WSL is the first step: establishing that your local development happens in a Unix environment, not Windows. So -- when you are working on a project, in most cases you'll live on the WSL side of the fence through VS Code. Don't be intimidated. You can do it! ## Installing the WSL Extension ### Step 1: Install the Extension Open VS Code and install **WSL** (by Microsoft): 1. Press **Ctrl+Shift+X** to open Extensions 2. Search for "remote dev" 3. Click the first result (official Microsoft extension) 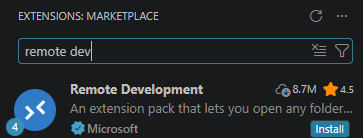 4. Click **Install** That's it. The extension will install in seconds. > We're installing the full Remote Development extension pack which includes the WSL extension because it will also come in useful later to have the ability to open Docker containers in VS Code. ### Step 2: Verify Installation In the Ubuntu terminal, open VS Code: ```bash code ``` Look at the bottom-left corner of VS Code. You should see an icon indicating the remote connection status. If you see the blue "WSL: Ubuntu" indicator, the extension is active.  ## Opening a WSL Project Folder 1. In the Ubuntu terminal, navigate to/create your project folder: ```bash cd ~/projects/my-project ``` Or create a new one: ```bash mkdir -p ~/projects/my-project cd ~/projects/my-project ``` 3. Open VS Code from that directory: ```bash code . ``` ## Working Inside WSL Once VS Code is connected to WSL, everything works in the Linux environment: ### File Explorer Your file explorer shows your WSL filesystem, not Windows: - `/home/username/` is your home directory - `/home/username/projects/` is where you keep projects - Paths use `/` not `\` ### Terminal When you open a terminal in VS Code (<kbd>Ctrl</kbd>+<kbd>`</kbd>), it opens **bash in WSL**, not PowerShell in Windows. This is perfect because you'll be completely ready to stay on the Linux side of the fence. ## Verifying Your Environment Open the terminal in VS Code (<kbd>Ctrl</kbd>+<kbd>`</kbd>) and verify you're in WSL: ```bash echo $SHELL ``` Should show `/bin/bash`. Check your location: ```bash pwd ``` Should show `/home/username/...`, not `C:\Users\...`. ## Common Issues ### VS Code Doesn't Show WSL Option Make sure: 1. You've installed the **WSL** extension 2. You have WSL installed (run `wsl --version` in PowerShell) 3. You have a Linux distribution installed (like Ubuntu) If you haven't installed WSL with Ubuntu, or installed it a long time ago, follow the previous entry in the series: http://pawper.dev/l/installing-wsl-windows-subsystem-linux ### Files Show as Modified Even Though You Didn't Change Them This usually happens when you edit files from both Windows and WSL. To avoid it: - Always edit files **inside VS Code connected to WSL** - Don't edit the same files from Windows and WSL simultaneously - Use VS Code's WSL connection exclusively for development ## Best Practice: Organize Your Projects in WSL Create a dedicated projects directory in WSL and keep all your work there. You should do this directly via Bash in the terminal: ```bash mkdir -p ~/projects/my-project cd ~/projects/my-project code . ``` Then always use `code .` from WSL to open projects in VS Code. This ensures VS Code always knows it's in WSL and everything stays in one environment. ## What About Windows Files? If you absolutely need to access Windows files (like Downloads), you can. They're mounted at `/mnt/c/`: ```bash cd /mnt/c/Users/YourUsername/Downloads ``` But for development, keep projects in your WSL home directory. Performance and permissions are better there. 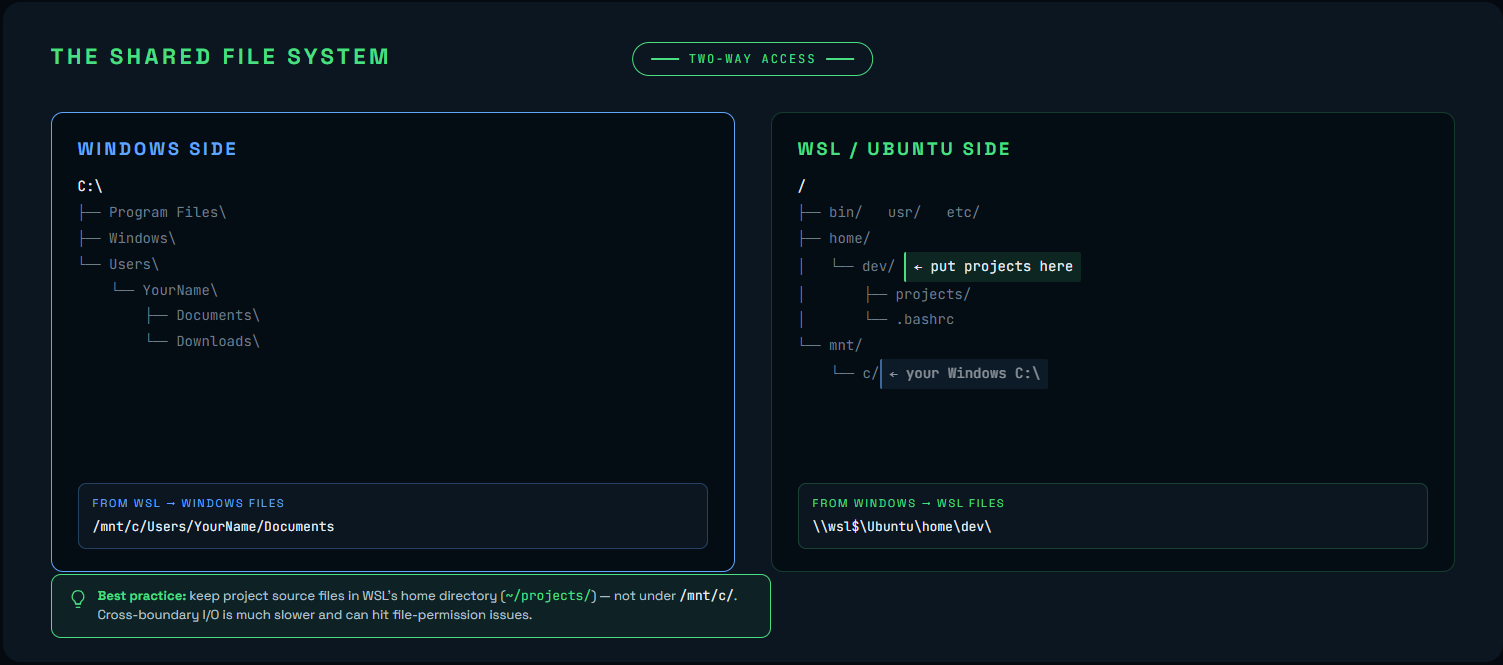 --- > **Sources / additional material:** > > https://code.visualstudio.com/docs/remote/remote-overview > > https://code.visualstudio.com/docs/remote/wsl > > https://code.visualstudio.com/docs/remote/wsl-tutorial _This article was generated with AI for the purpose of providing practical information. I have reviewed it and edited it appropriately._